General set-up
Cables and (internet) network
Operate your Scion
Dashboard - How to access
Using Roon - connecting to USB DACs
- Using Roon
- Connecting to USB DACs
Copy music to and from your Scion
Troubleshooting
Using Roon
We thank Roon for the development of the high quality and versatile music player they have created. Roon Radio is one of our favourite options to explore new music. The Pink Faun Scion uses Roon Core and Roon Ready as the default playback options with single and dual configurations.
To start your musical journey, download Roon Remote from the Apple App Store or from the Google Play Store to your Phone or Tablet and it will automatically search for the Pink Faun Scion Roon Core server.
- We highly recommend using a tablet for Roon Remote. A smartphone screen is too small to get yourself immersed into the Roon experience.
To use Roon, a subscription is required. This subscription is not included with the Scion and must be activated on your personal (email) account. Create a Roon account and activate your subscription, or if you already have an existing Roon account, you can use it on the 2.16 ultra. Although the Roon subscription is not tied to specific hardware, your account can only be used on one device at a time. It is best to log-out from any other devices utilizing Roon Core as its functionality. The 2.16 ultra is the only ultimate Roon Core device you will ever need.
Every Scion server is fully configured before shipping, so it is ready to use right out of the box. In some cases, you may need to perform additional setup - such as mounting a NAS within your home network. If you're using a USB-capable DAC, configuration steps are covered in the next section.
For any other questions, the Roon Knowledge Base provides clear, step-by-step guidance on how to use Roon and can be accessed through this link:
https://help.roonlabs.com/portal/en/kb/roon-labs-llc
- For support, please contact the Pink Faun Support team here.
Connecting and playing to USB-capable DACs
When an USB bridge is mounted inside the server, it is compatible with DACs that follow the USB Audio 2.0 Class specification. Maximum sample rate or DSD support depends on your DAC and how it presents itself to the operating system of the music server. These can also be limited by Roon’s audio zone settings, as described in the following steps.
Follow these steps to connect, configure and play to USB-capable DAC:
1. Connect the USB cable from the USB audio interface of your streamer to the USB input of your DAC.
You may find that your music server is equipped with two USB ports. Ensure you do not use the port labeled “Service” for audio playback, as doing so will reduce the performance of your system.
2. Open the Roon Remote app on your tablet, computer, or smartphone:
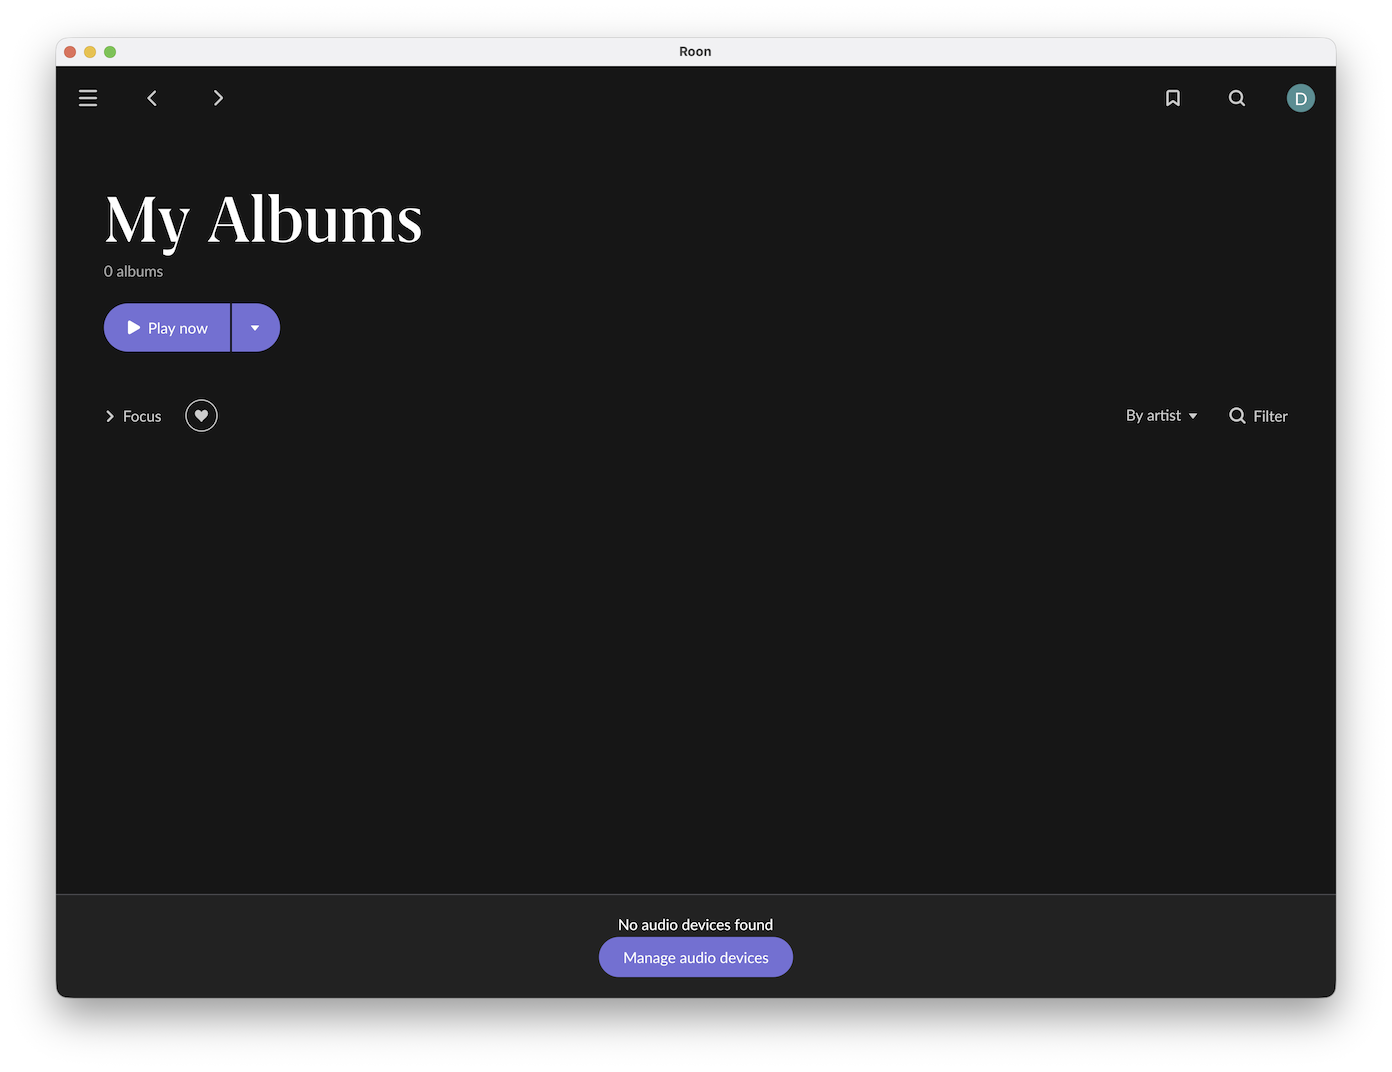
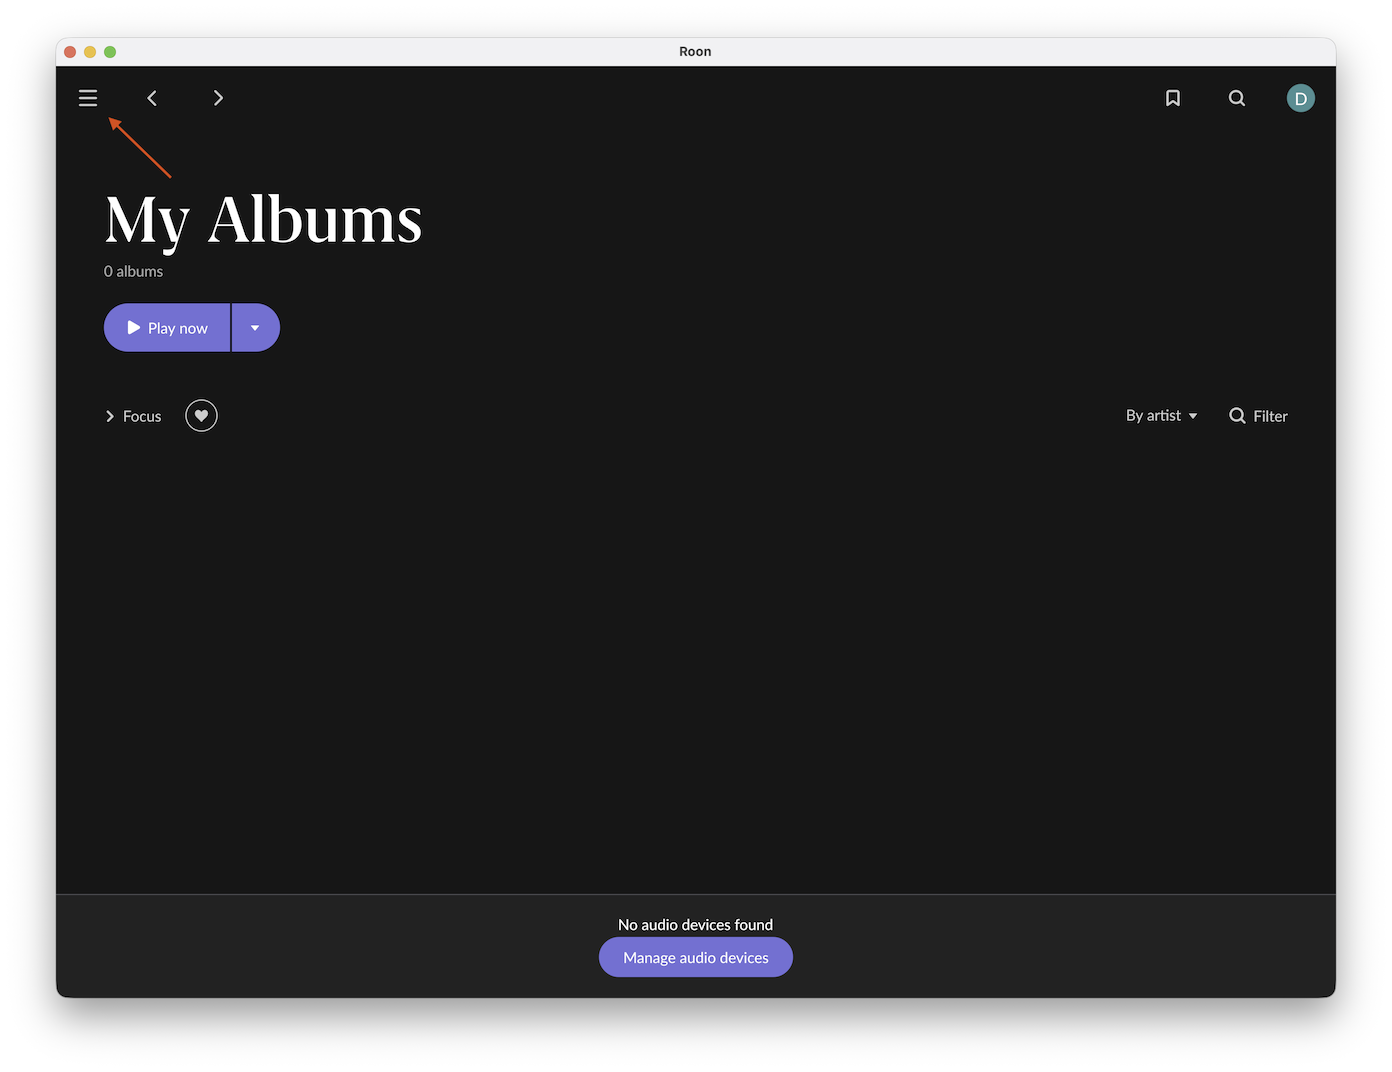
3. Click on the three horizontal lines icon in the top-left corner to open the navigation menu:
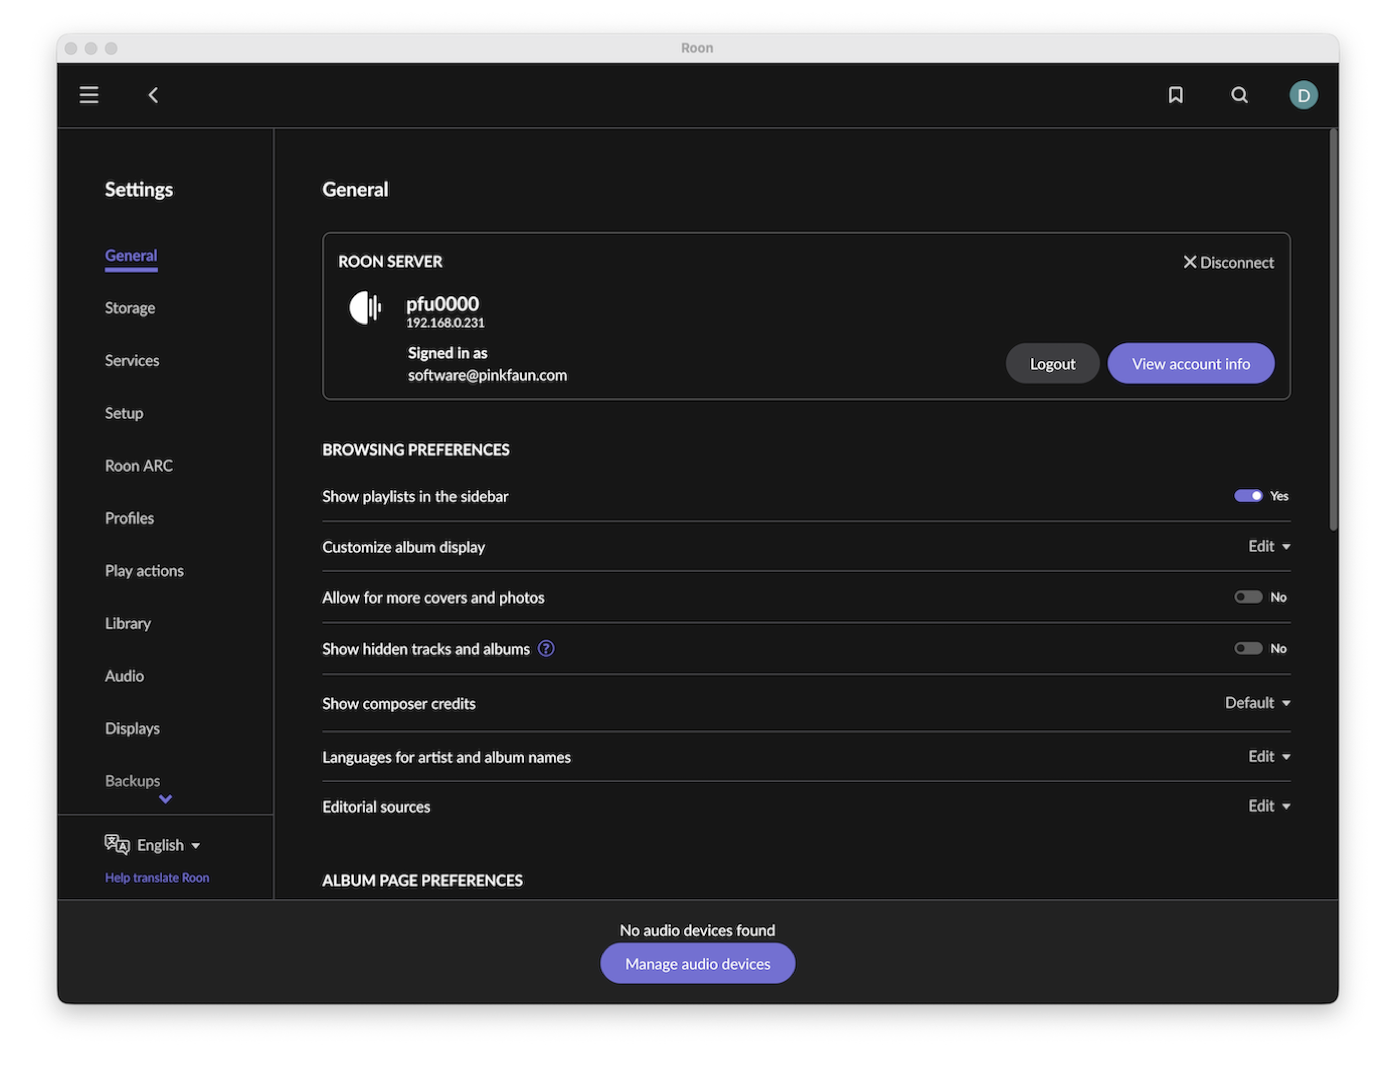
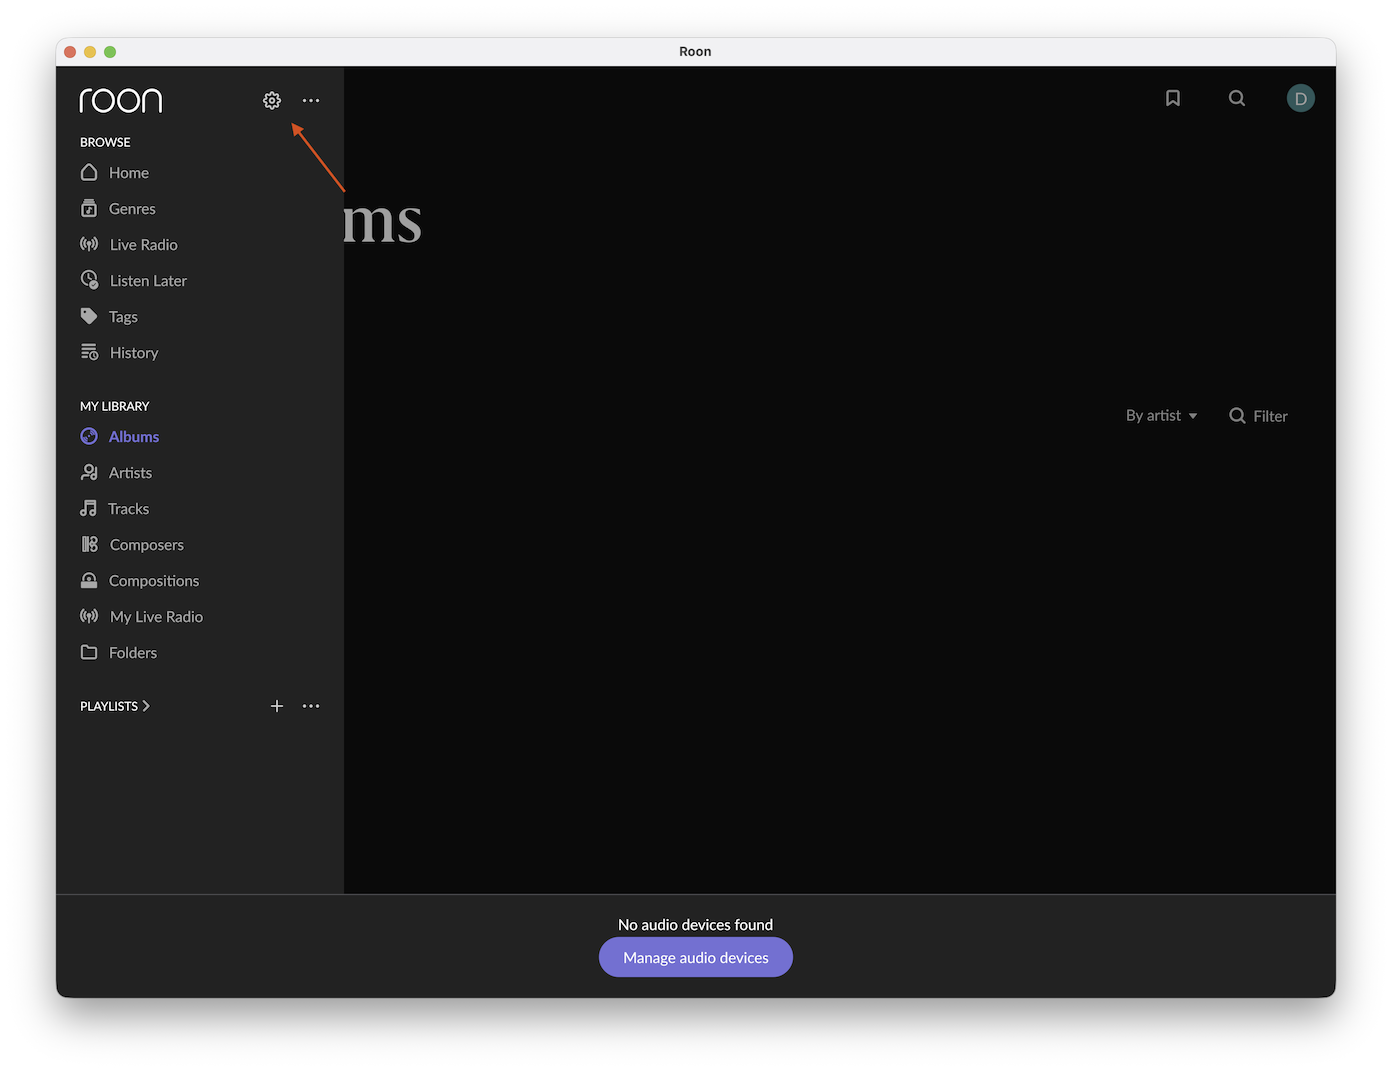
4. Click the cogwheel icon from the navigation bar to enter Settings:
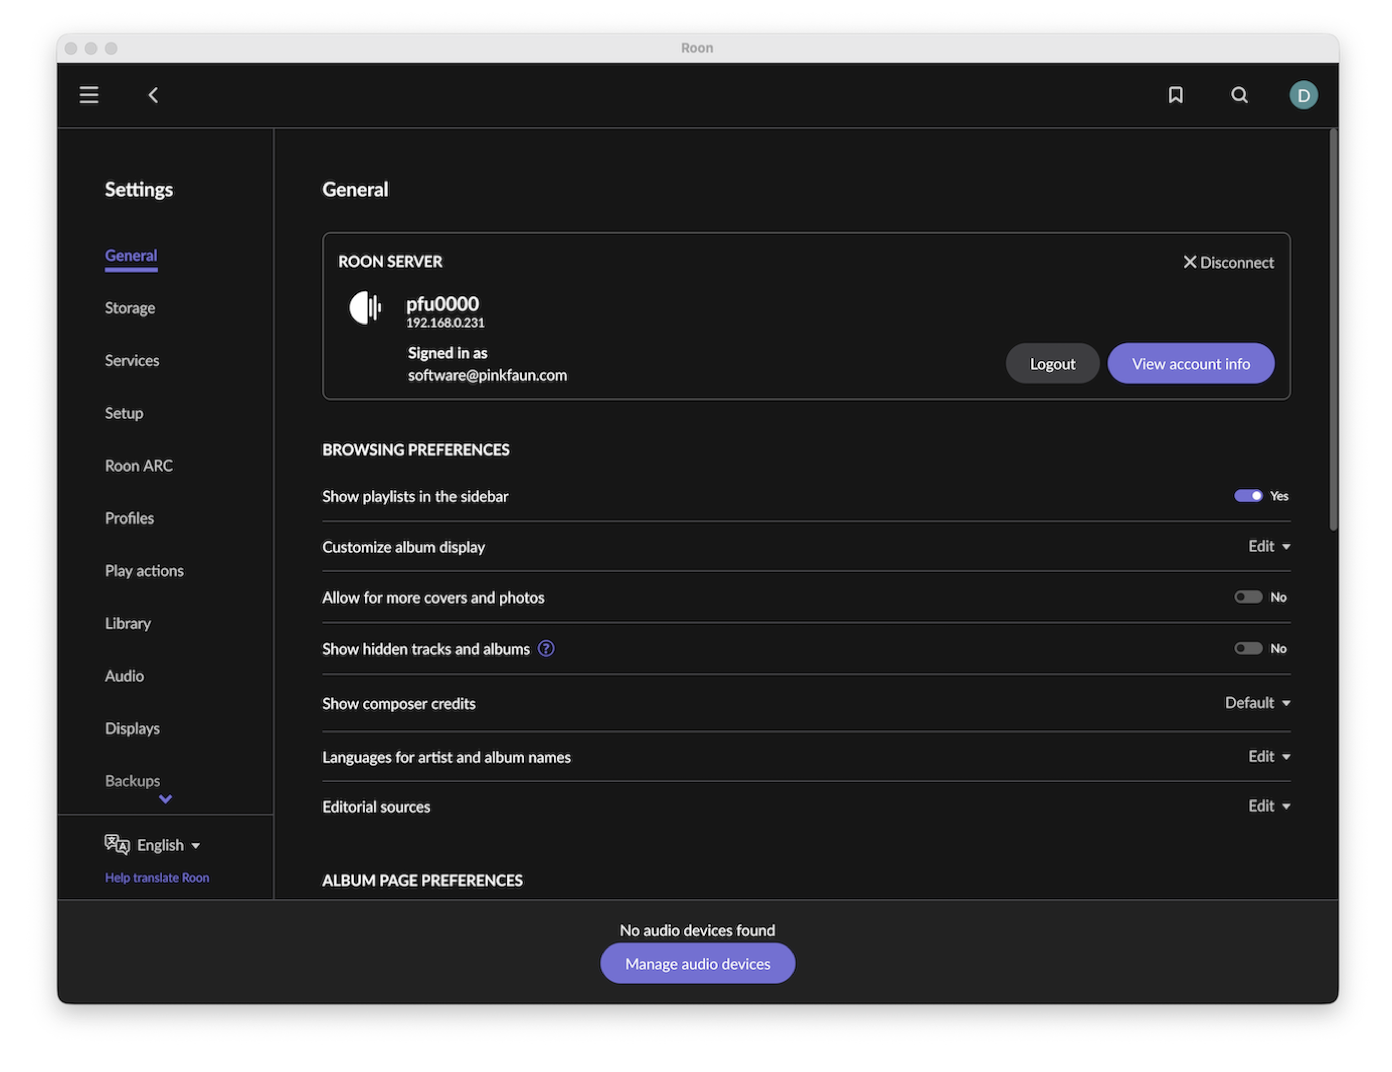
Under the General tab, ensure you are connected to the Roon Server running on your Pink Faun
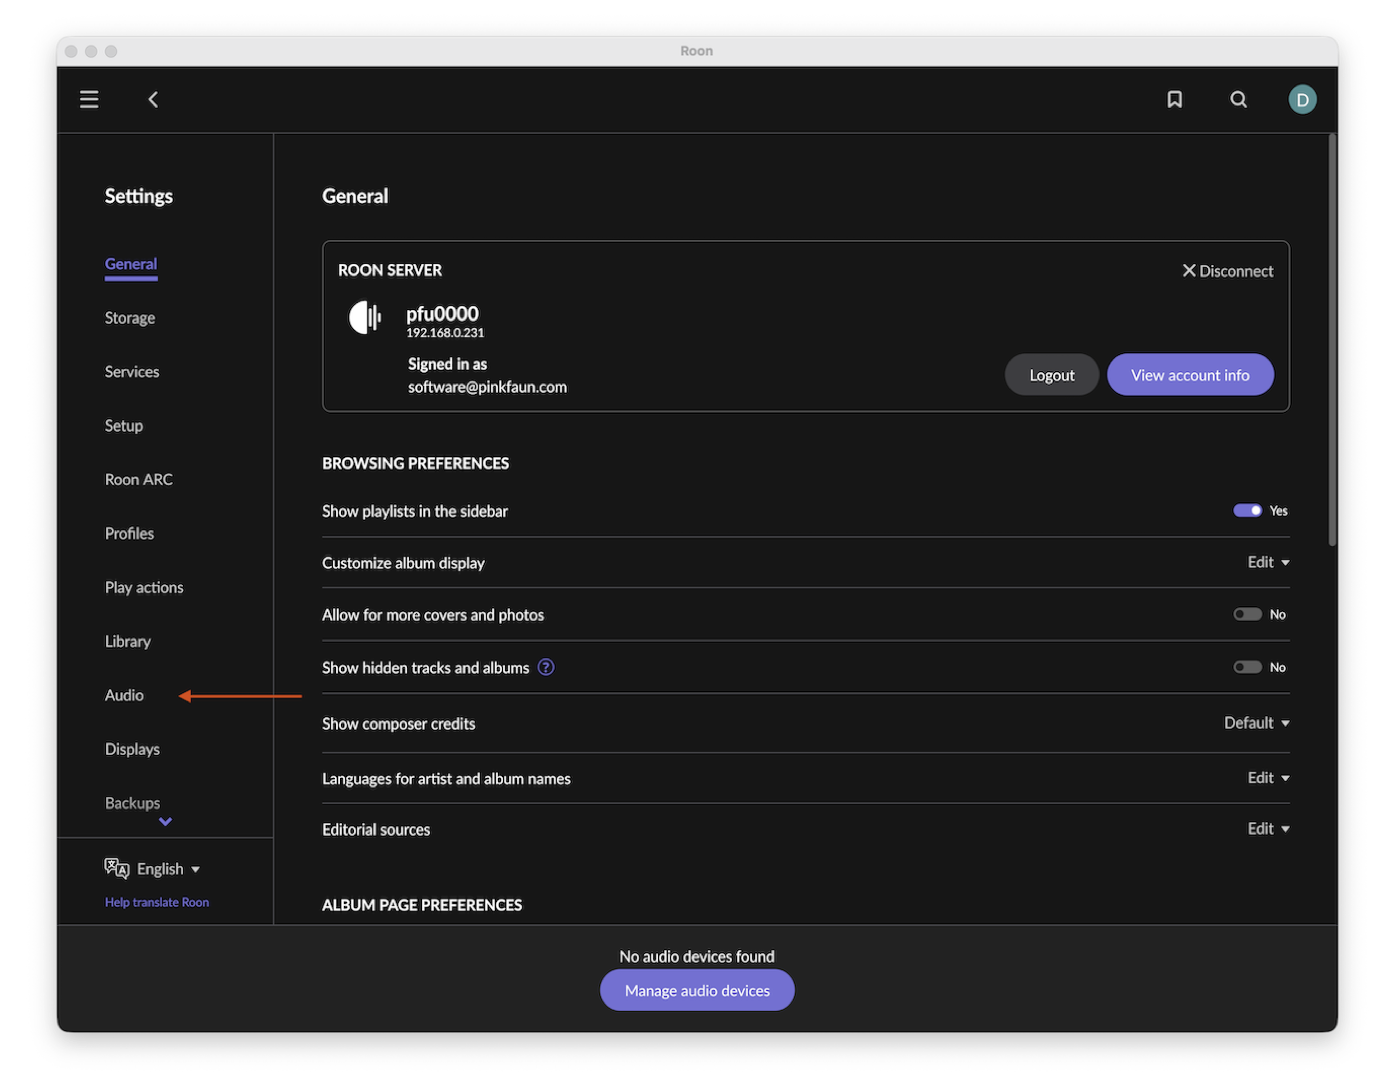
5. Select the “Audio” tab to access the audio zones overview:
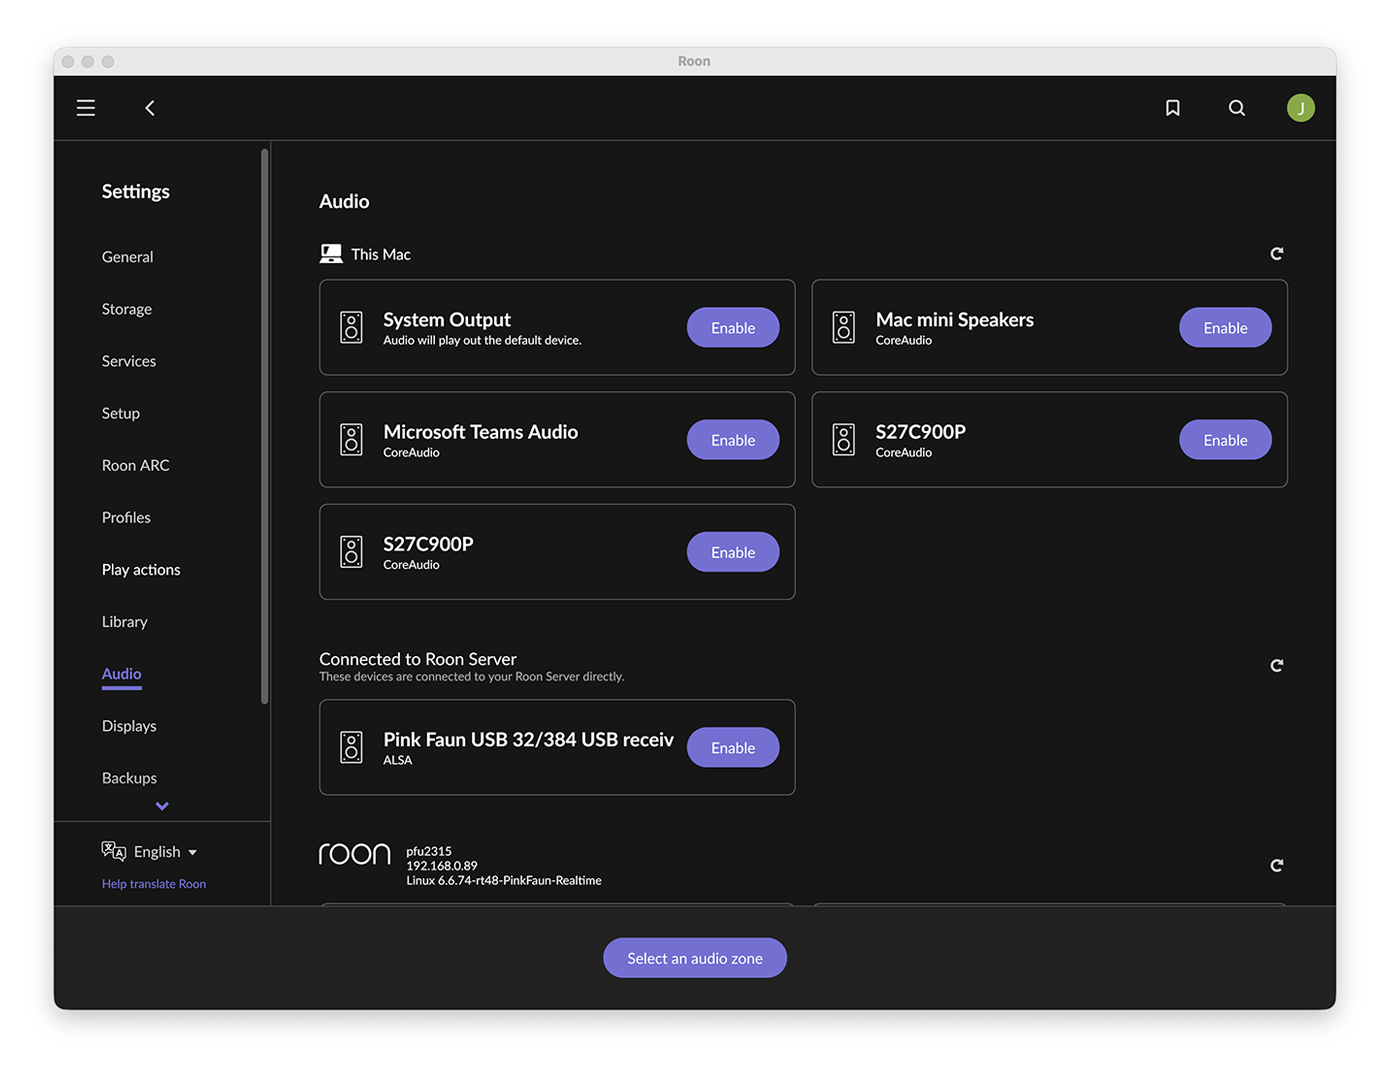
You will see all available Roon output zones found on the network. Locate the section labeled “Connected to Roon Server”.
6. Click “Enable” to activate the desired zone:
The identification name of the USB audio zone depends on your DAC. Since many DACs use standard USB receiver modules, names such as Amanero, XMOS or JLsounds may appear.
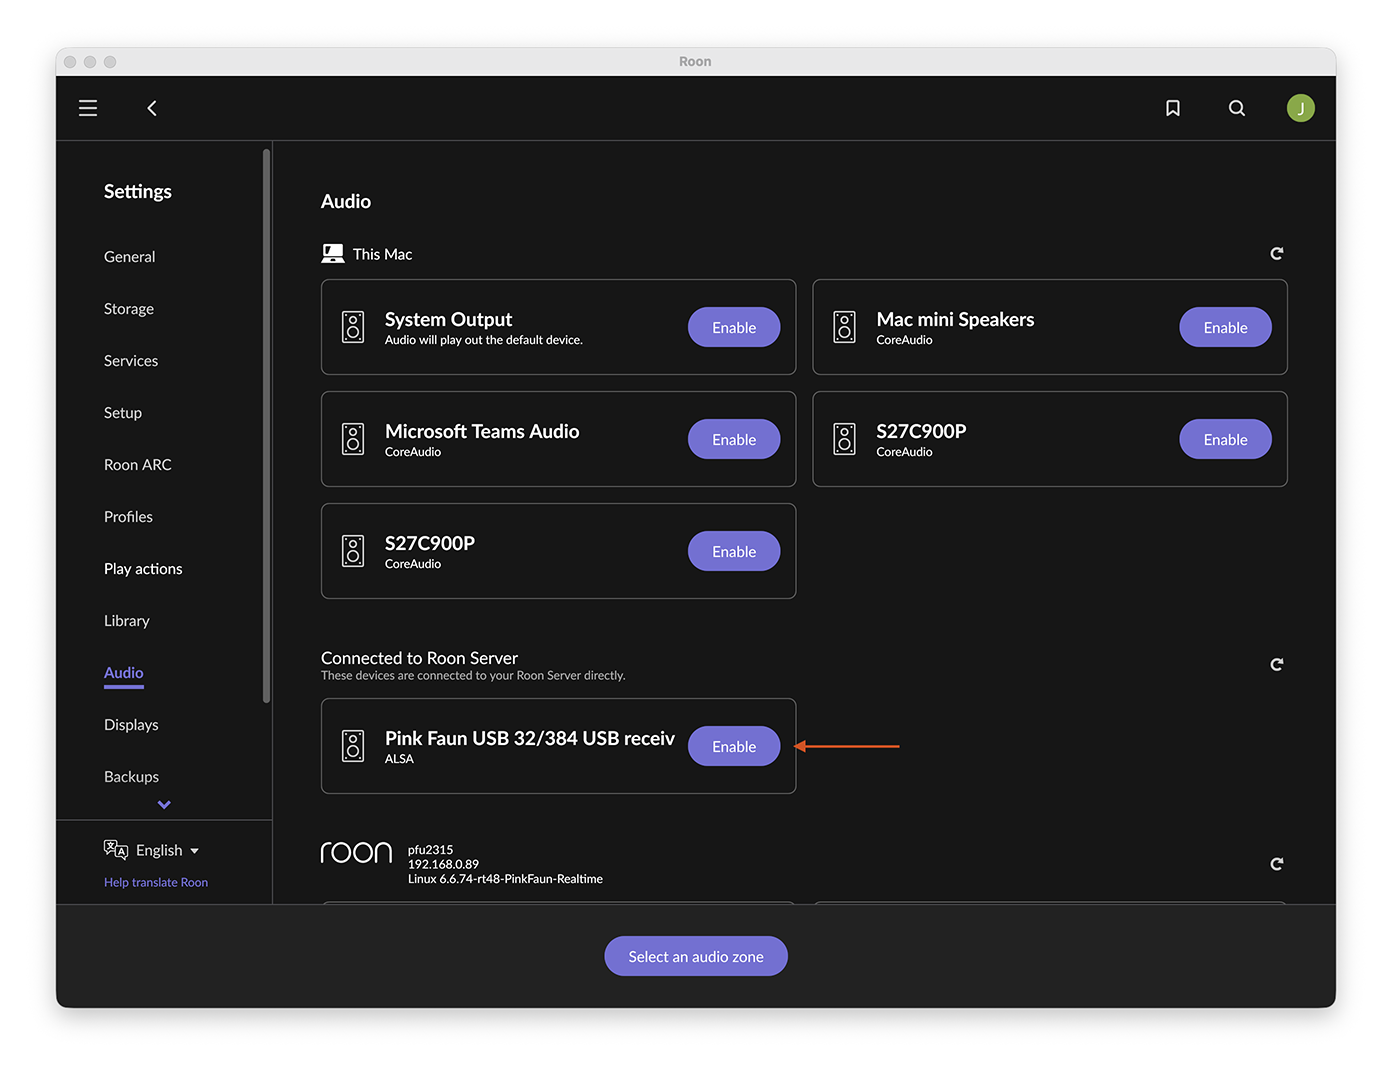
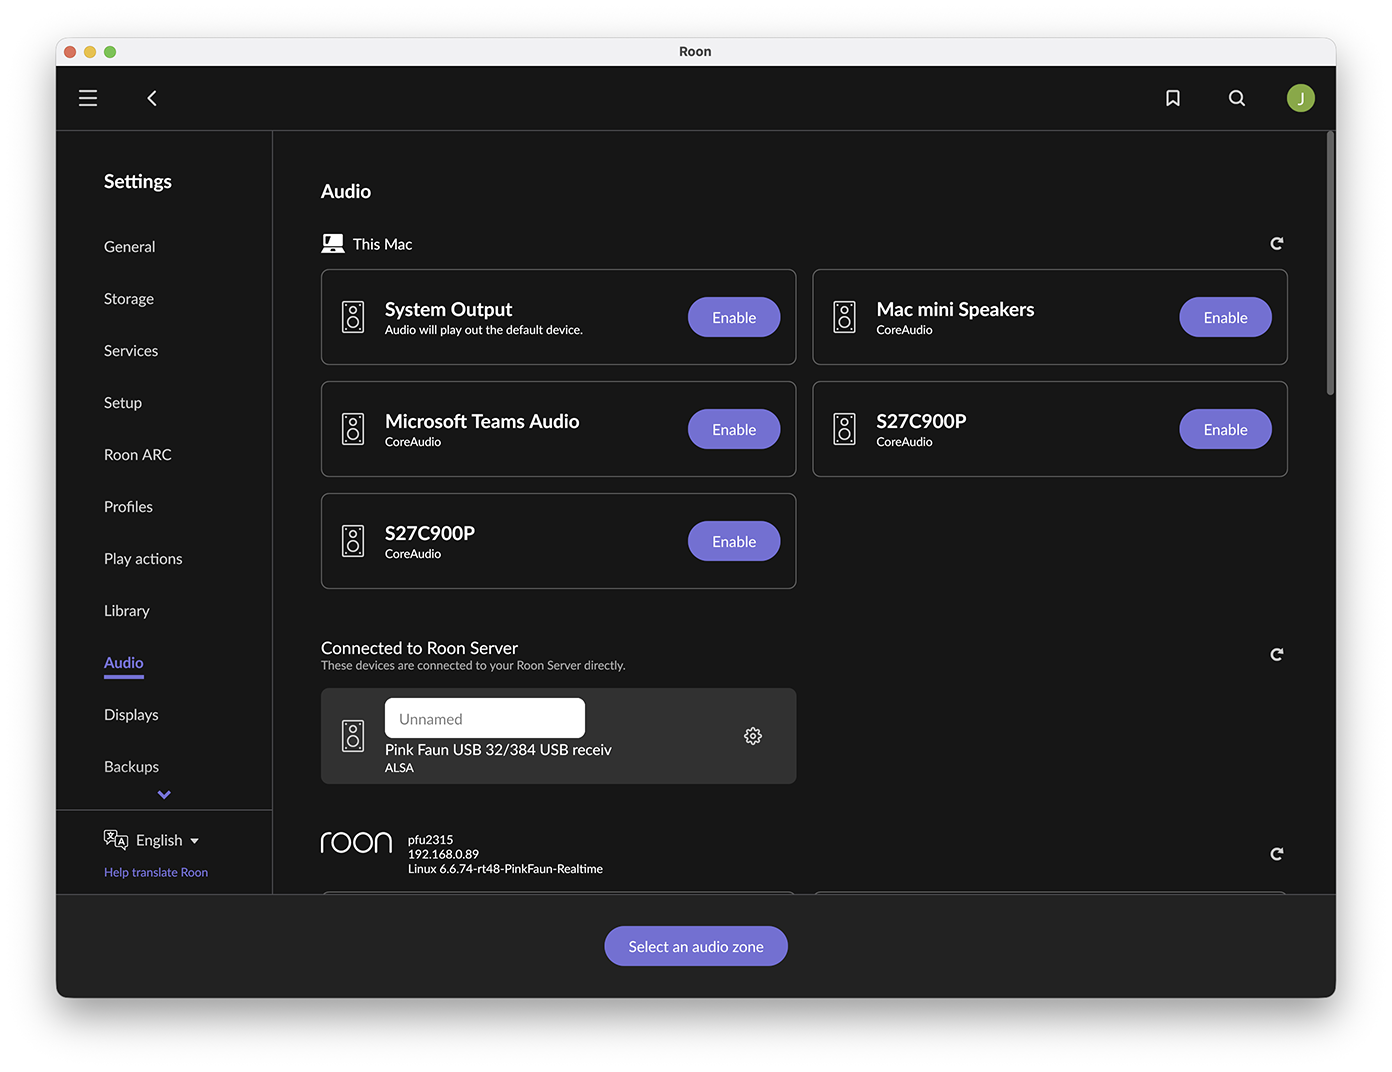
Unlike persistent outputs (such as S/PDIF or I2S), the USB audio zone is only visible when a USB cable is connected, and the DAC is powered on. If the USB zone or the “Connected to Roon Server” section does not appear, refer to the troubleshooting section of this manual.
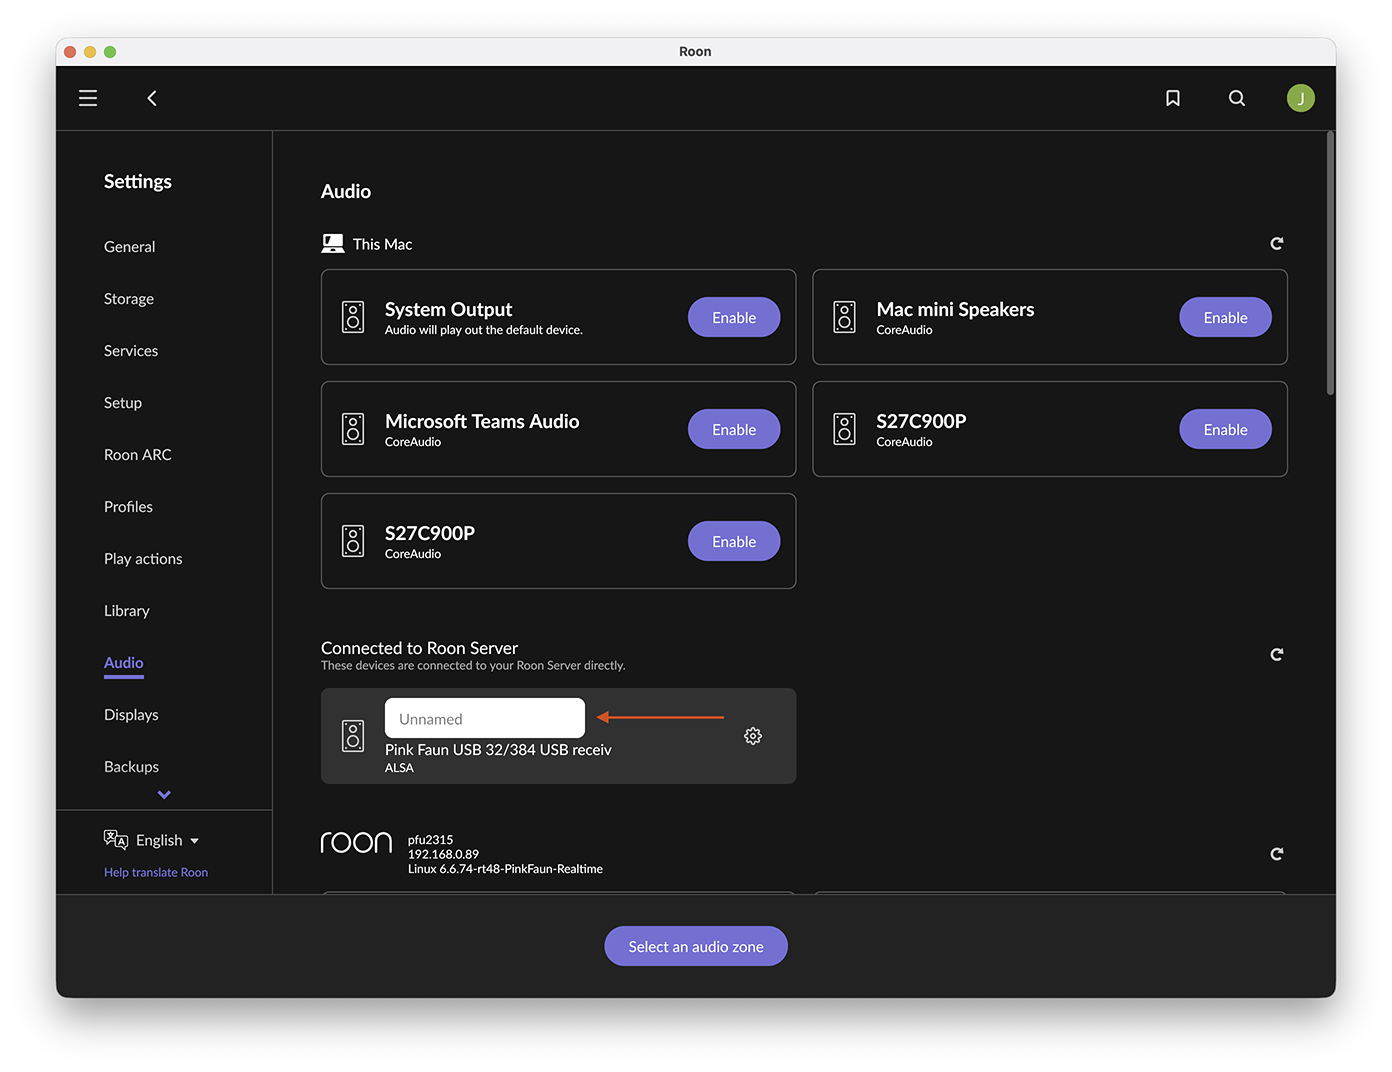
7. By default, the zone name is left blank (Unnamed), allowing you to personalize it freely. If the automatically detected name accurately reflects your connected DAC, we recommend keeping it unchanged for clarity and consistency. However, if the name is generic or does not resemble your device (as is often the case with standard USB receiver modules), feel free to assign a custom name that helps you identify the zone more easily:
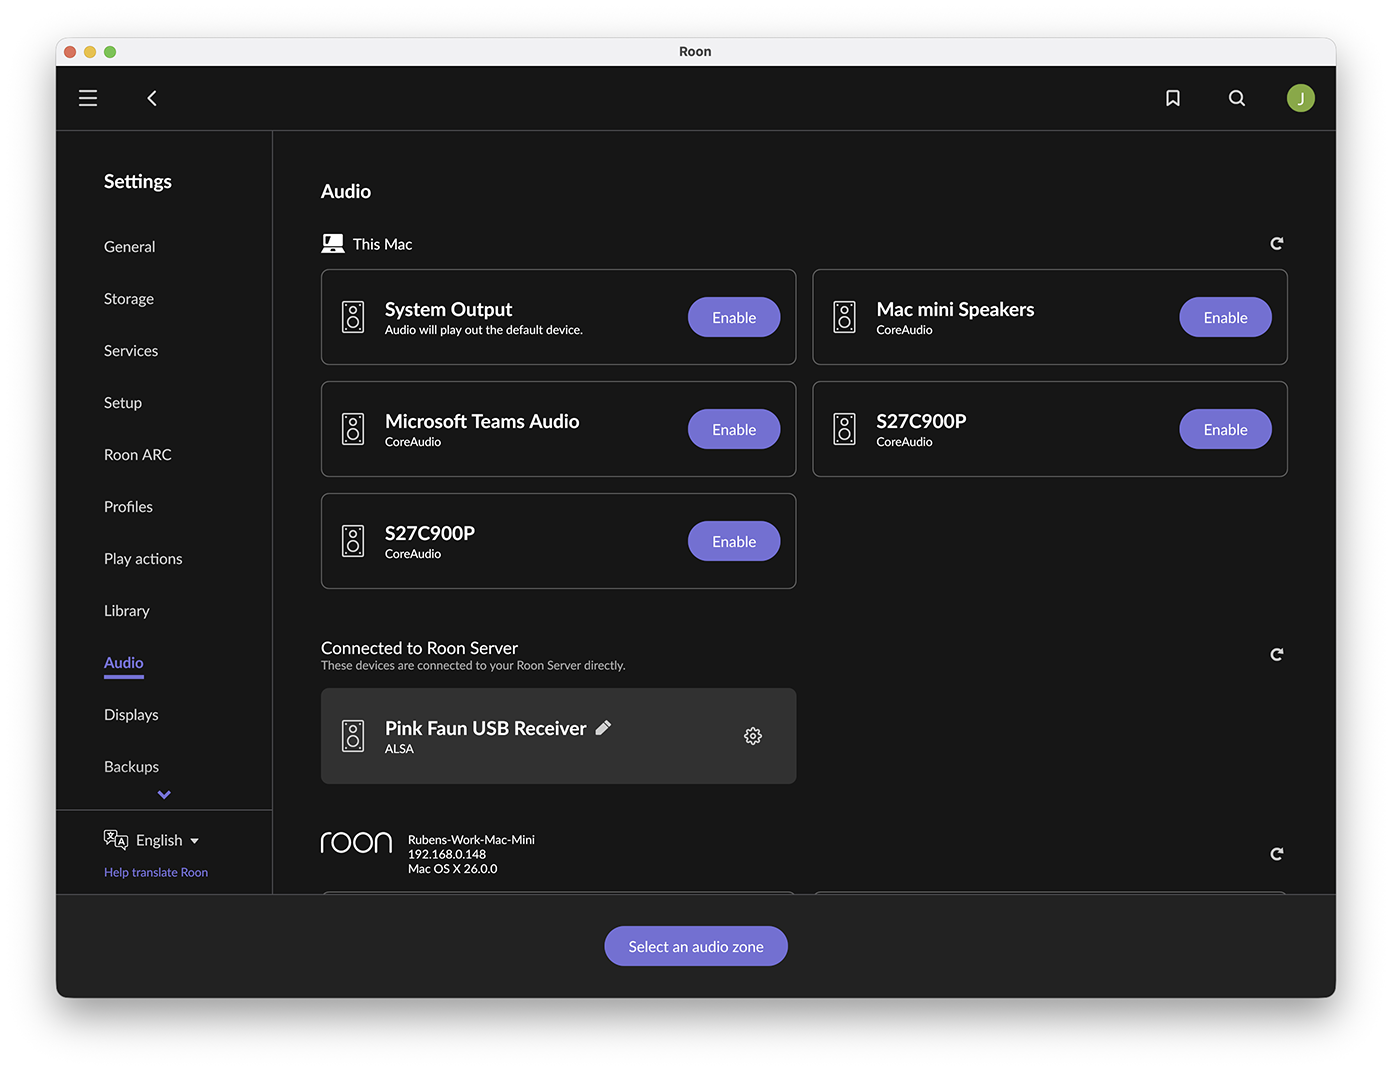
8. Click the cogwheel icon next to the active zone and select “Device setup” to open the configuration panel:
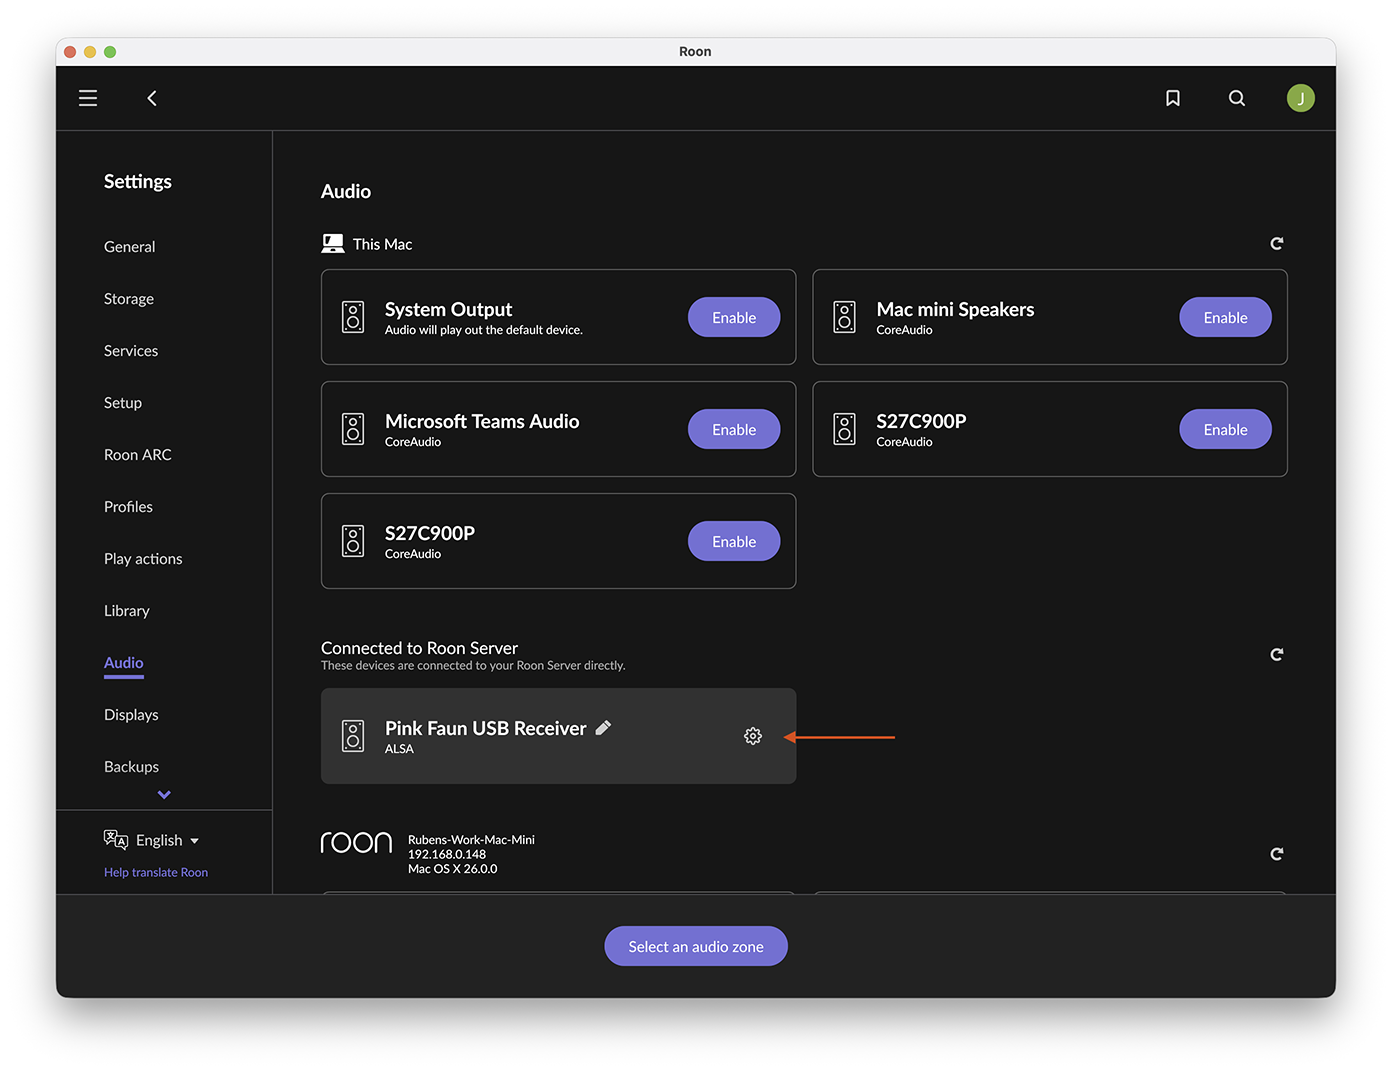
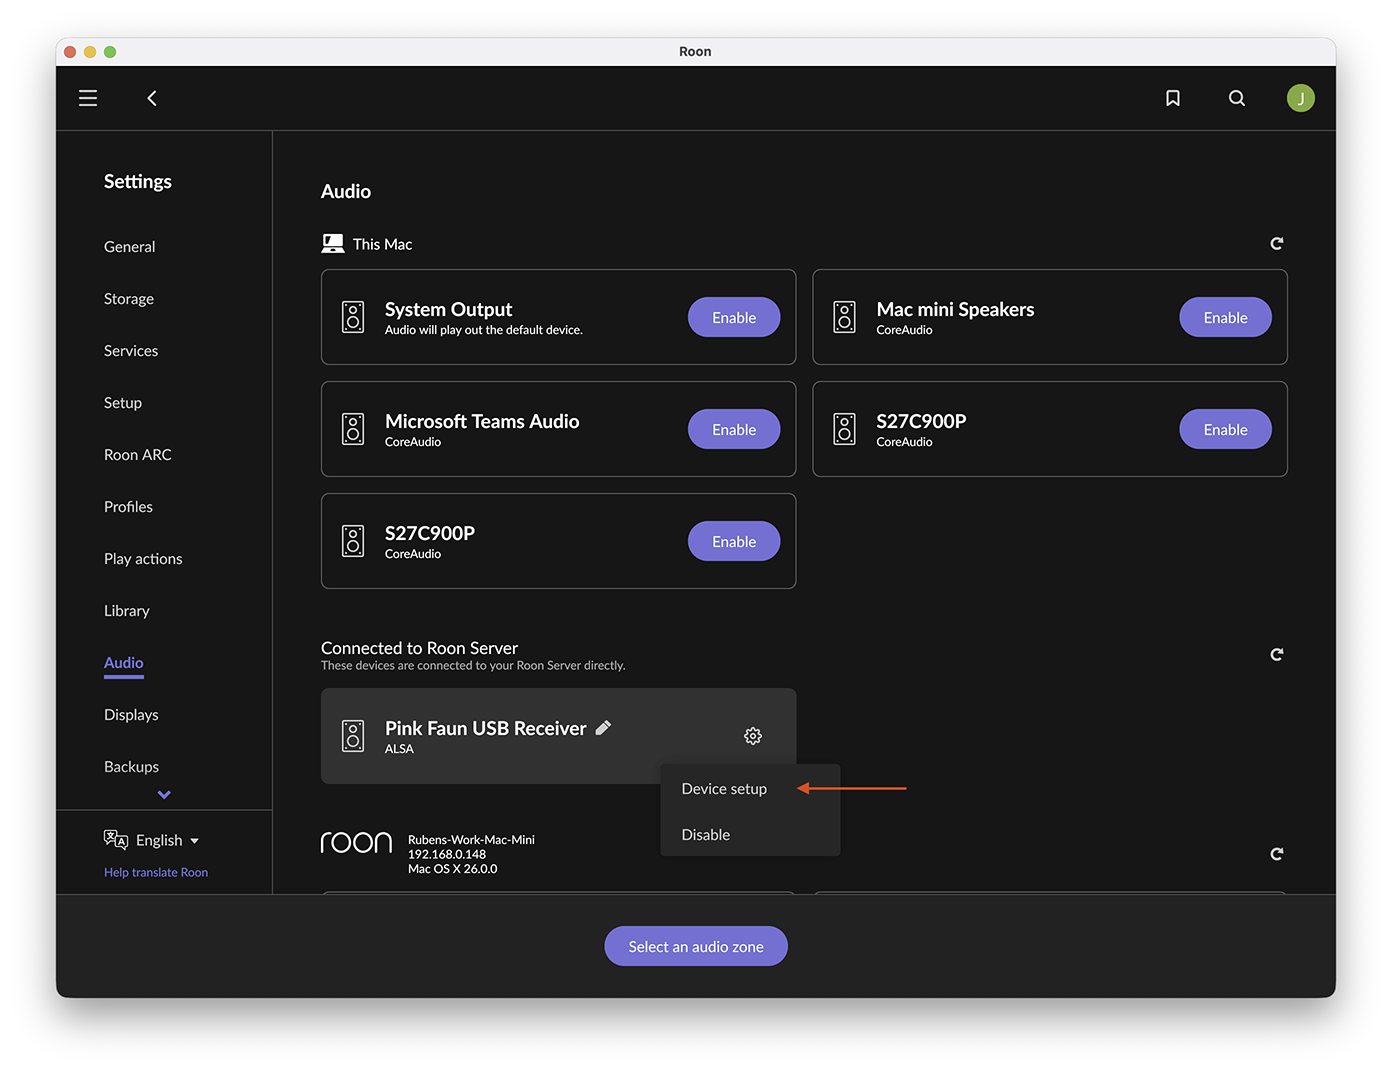
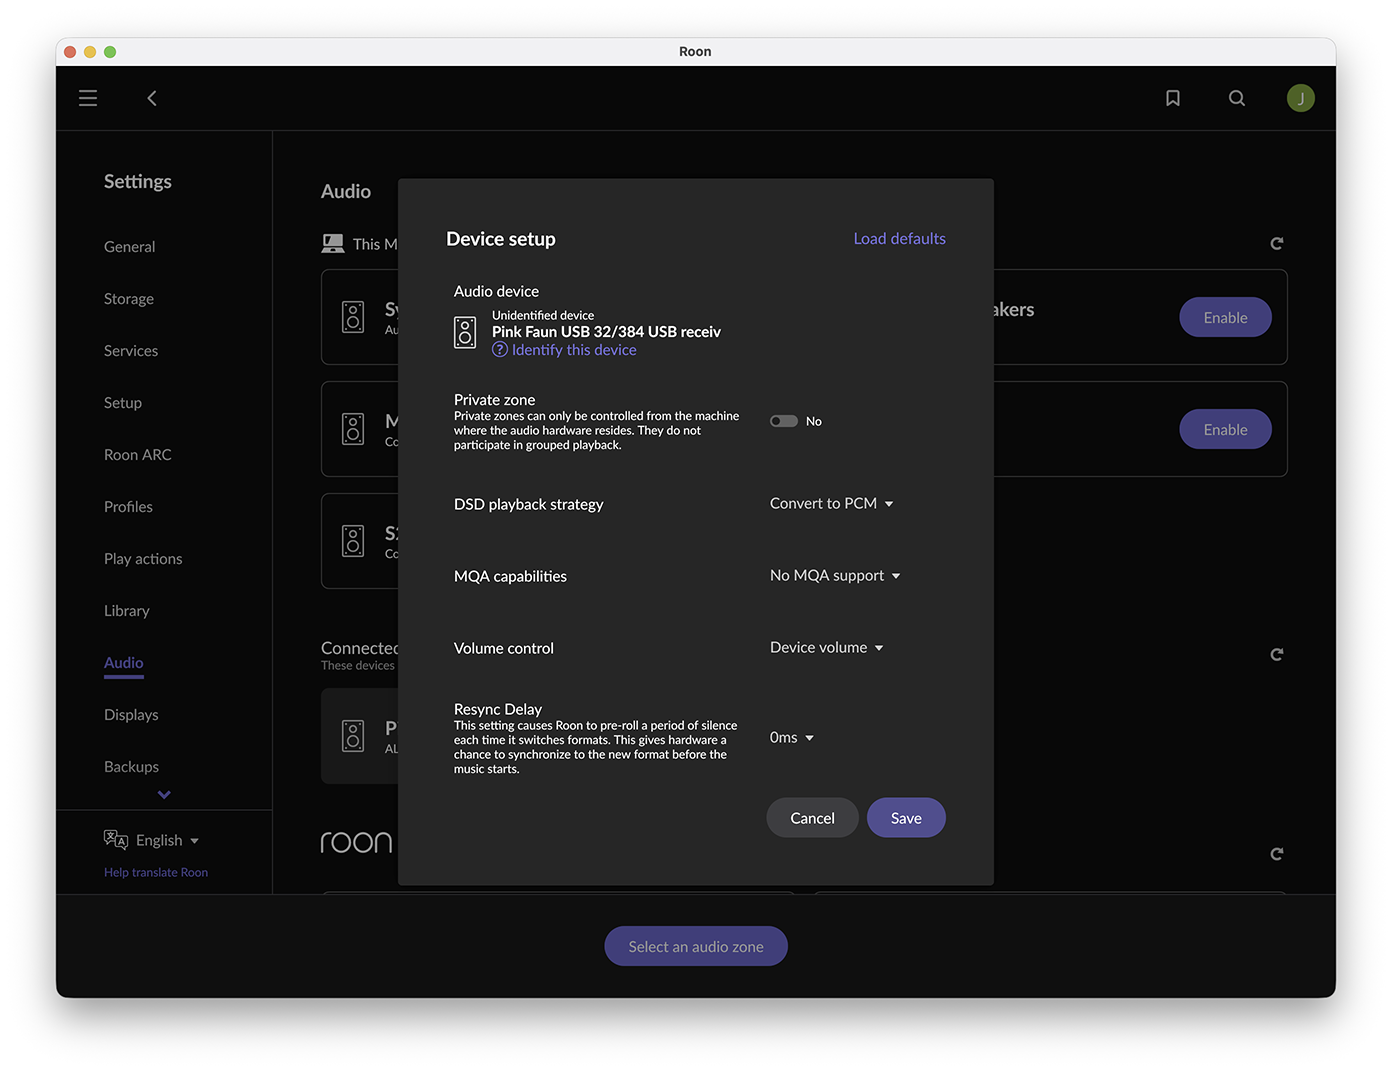
9. You will see the basic settings for the selected audio zone. Click “Show advanced” to reveal all available options:
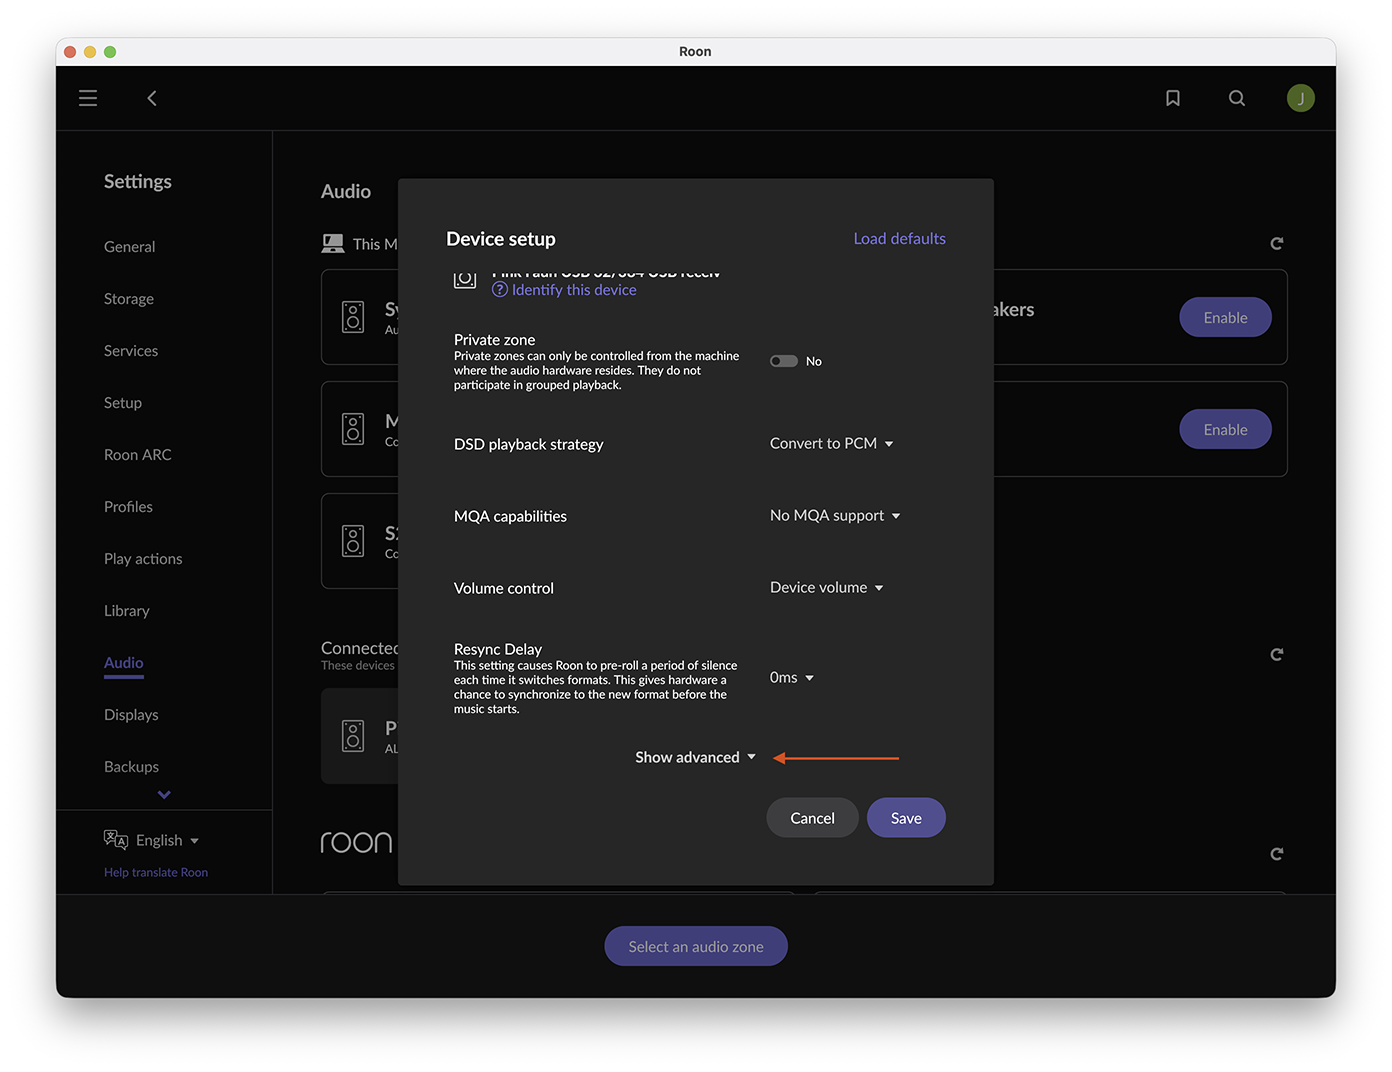
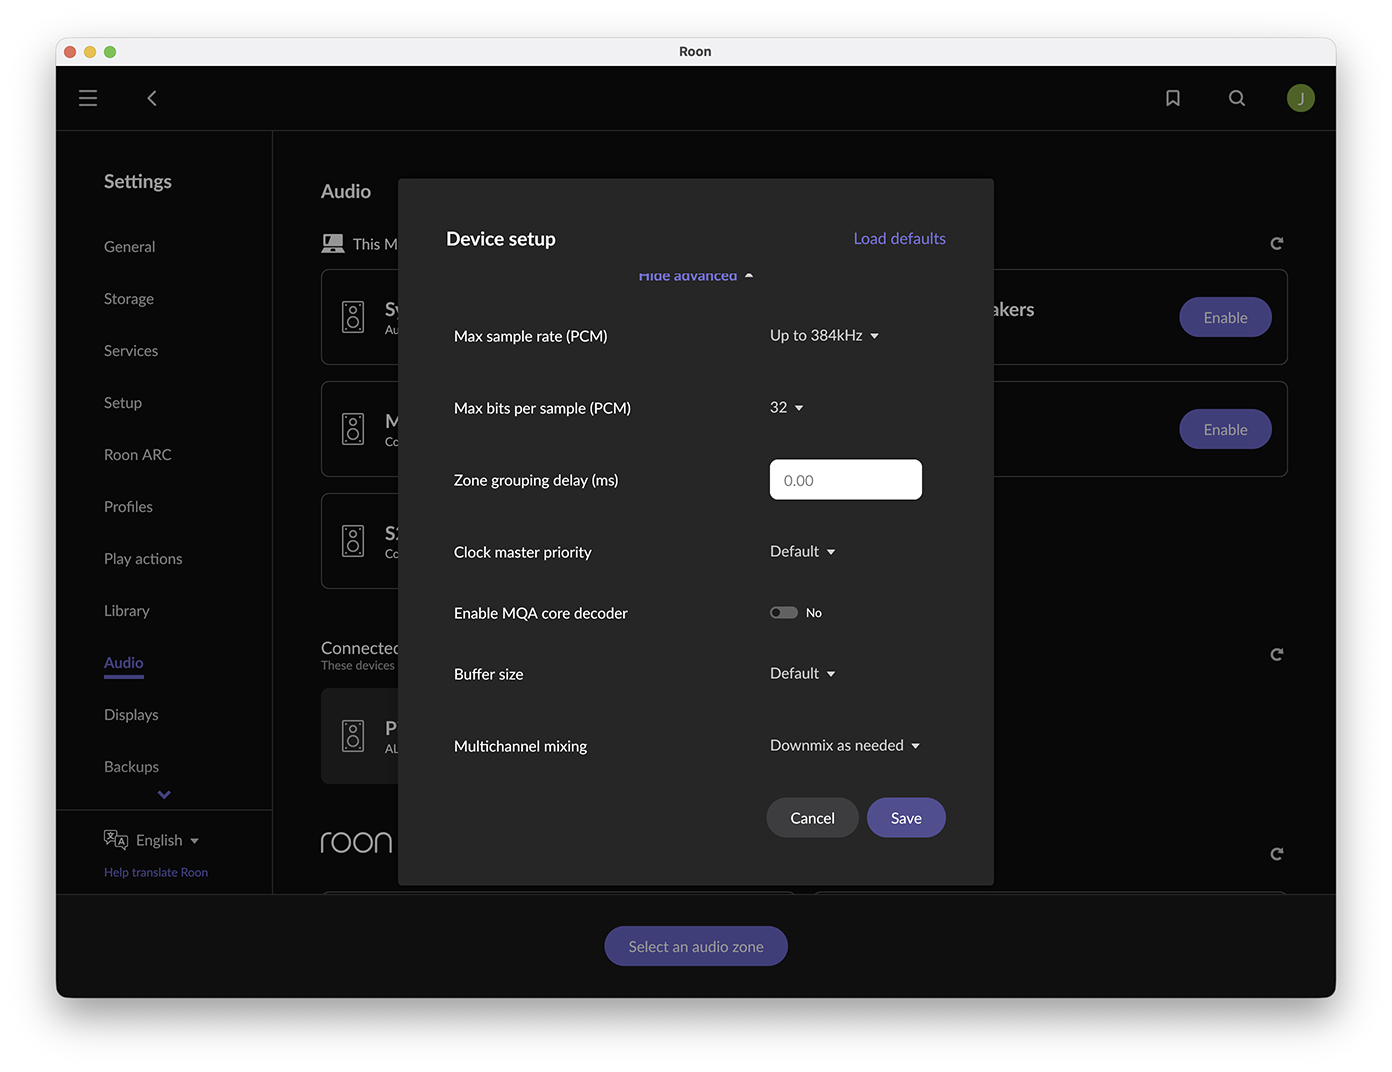
Configure all settings according to your DAC’s specifications. In many cases, the default values will be optimal. Click “Save” to confirm.
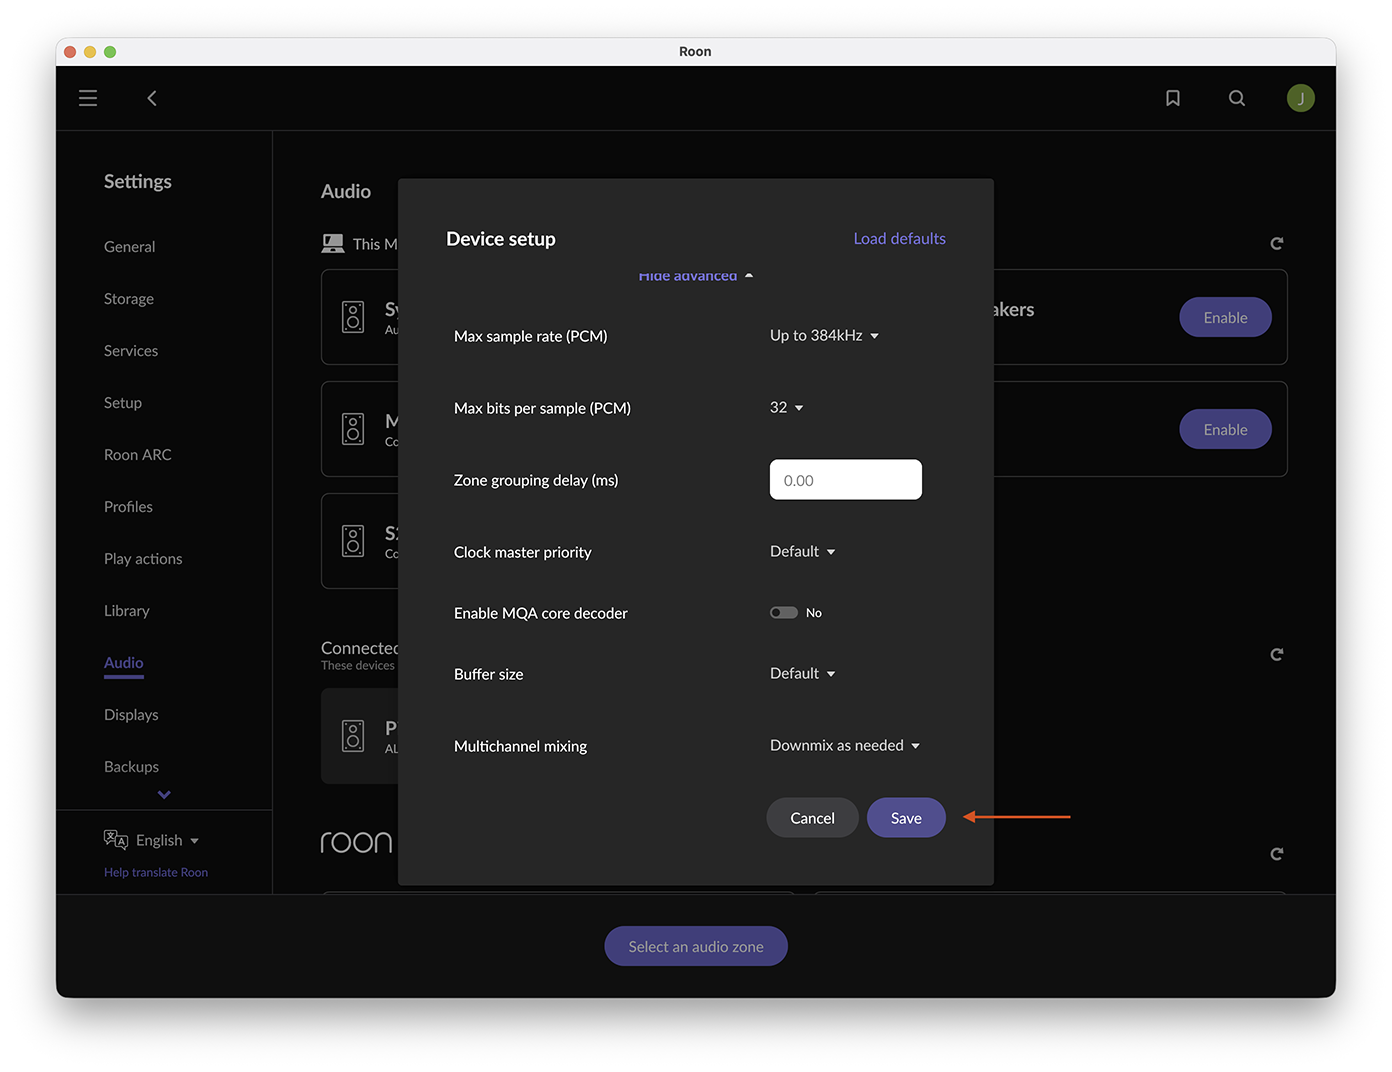
10. Finally, click “Select an audio zone” visible on the bottom of the screen, then choose the newly configured output:
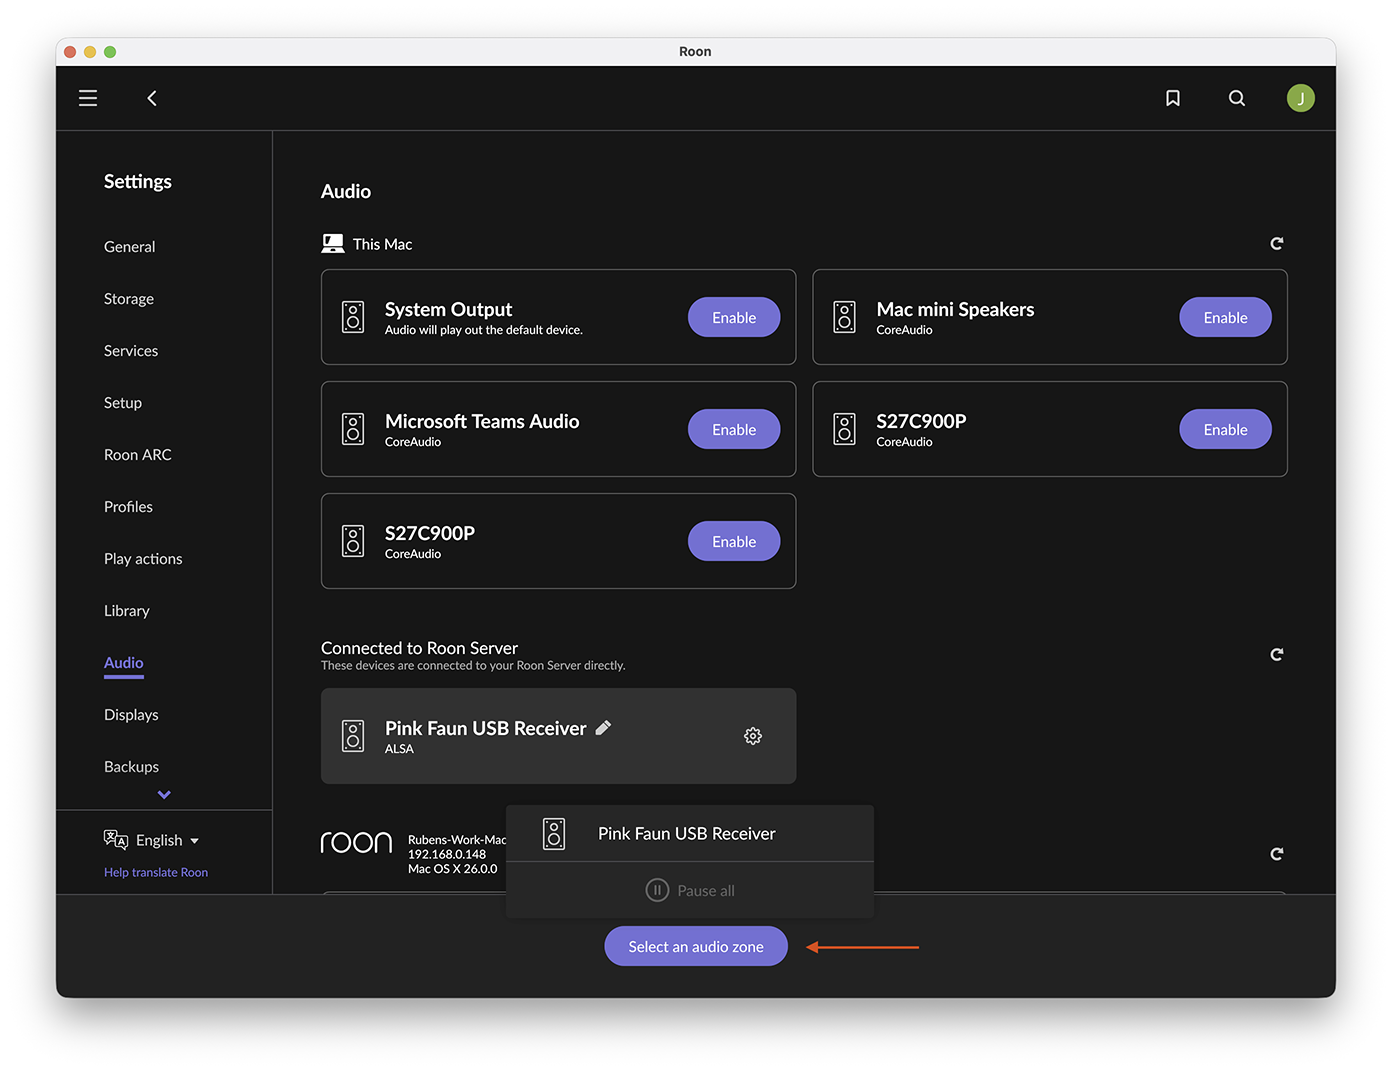
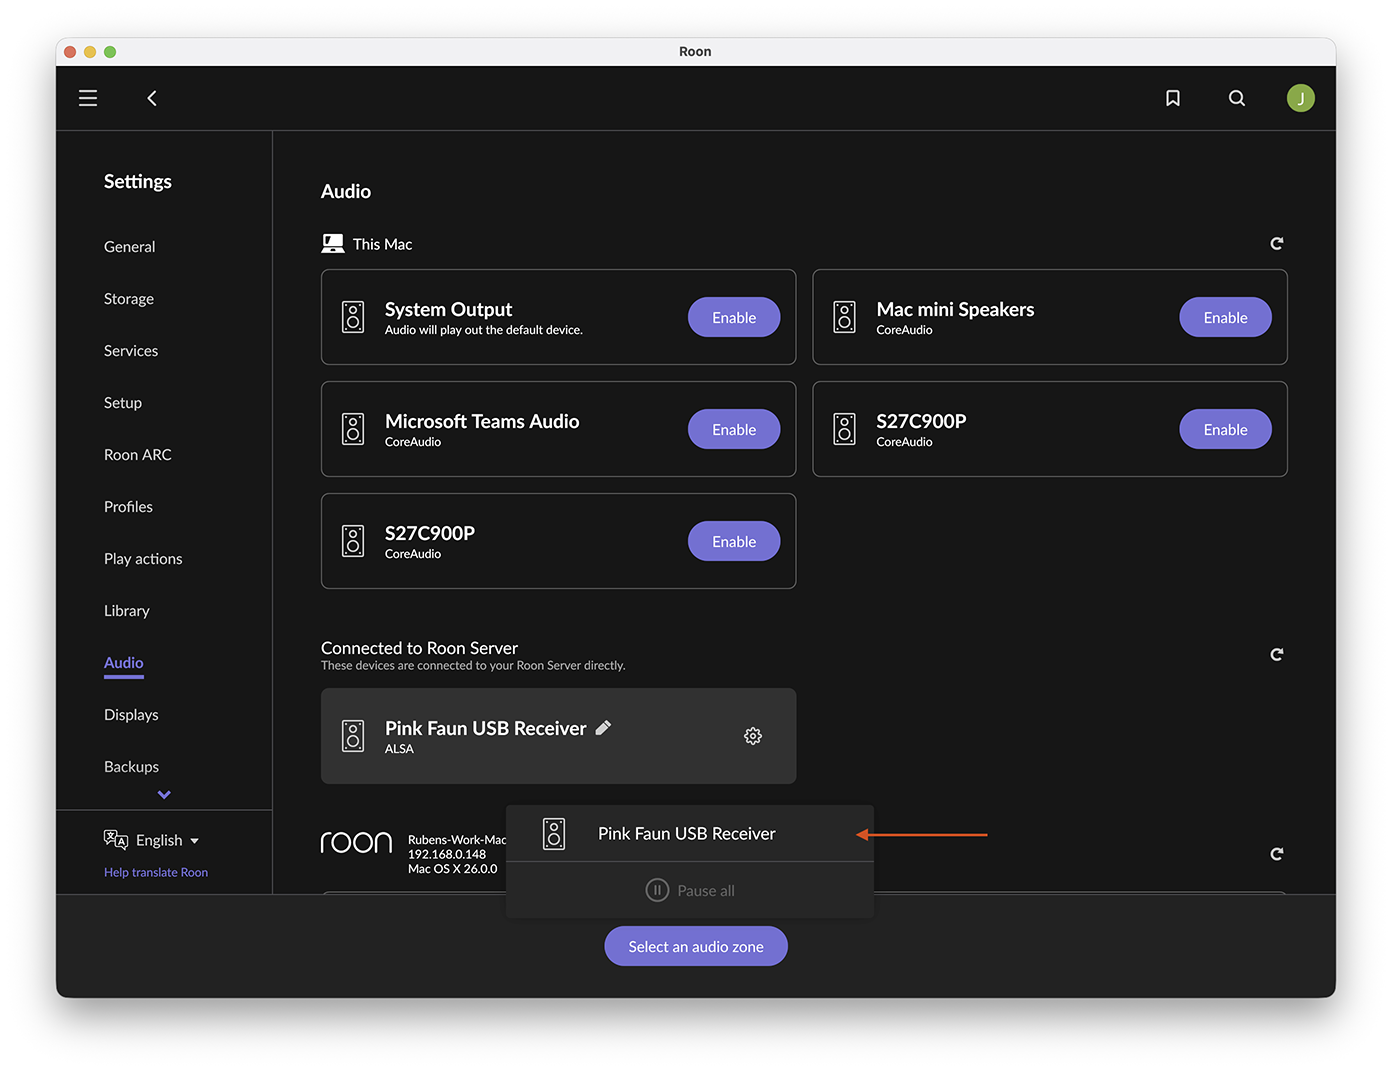
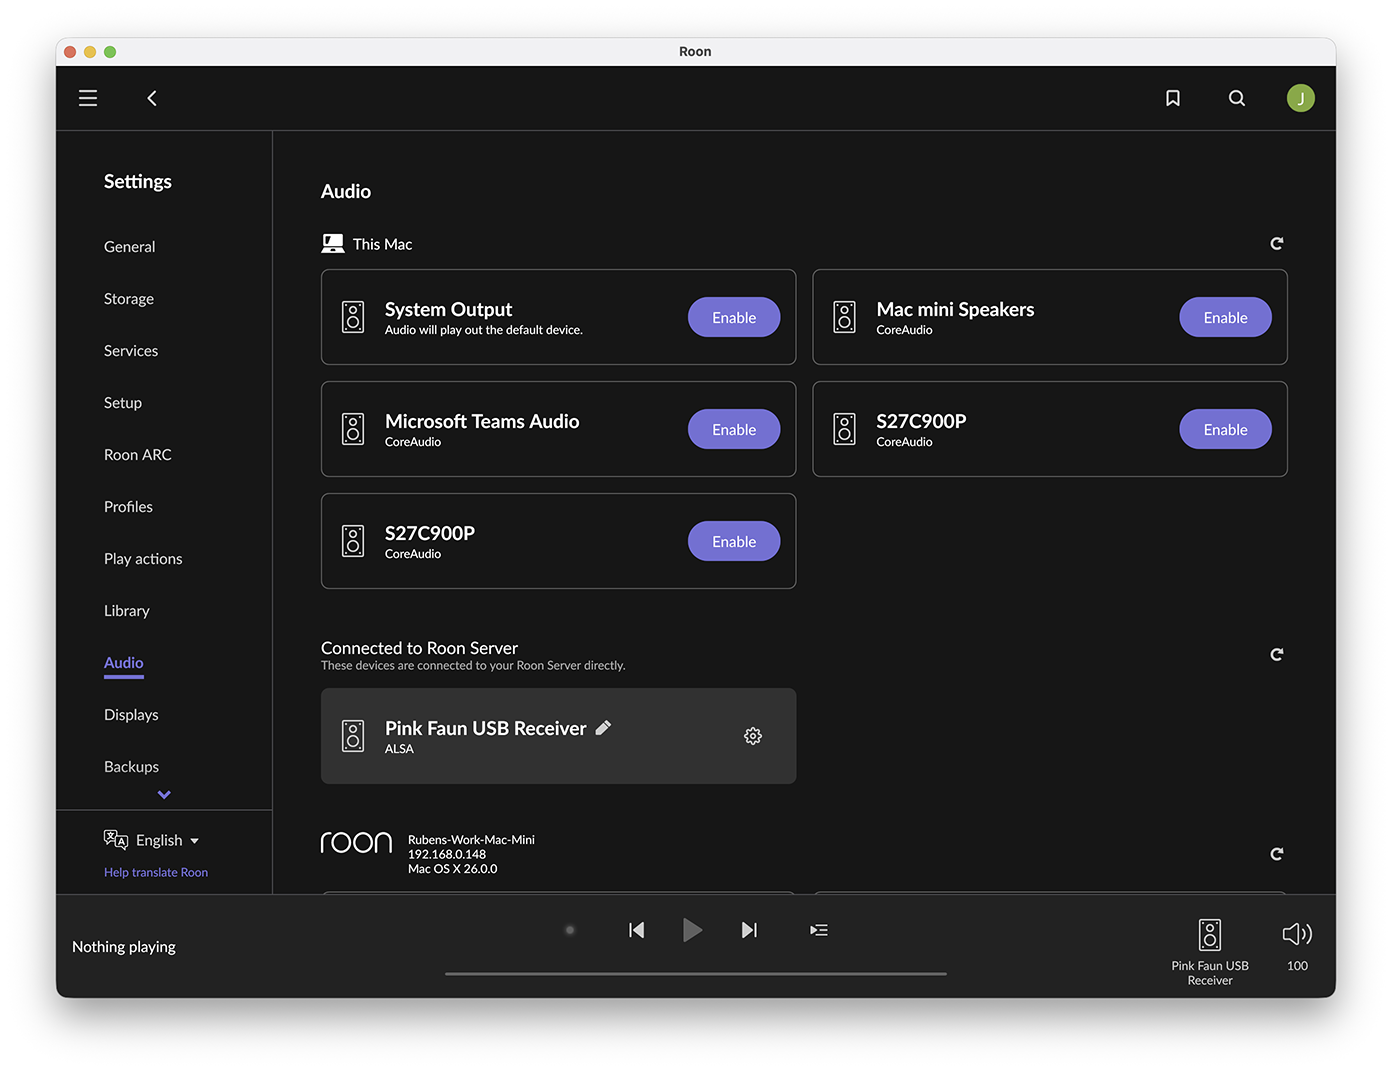
Unlike persistent outputs (such as S/PDIF or I2S), the USB audio zone is only visible when a USB cable is connected, and the DAC is powered on. If the USB zone or the “Connected to Roon Server” section does not appear, refer to the troubleshooting section of this manual.
The configuration is now complete!
You can now enjoy playback via your USB DAC. Simply navigate to your favorite album and begin your musical journey.