General set-up
Cables and (internet) network
Operate your Scion
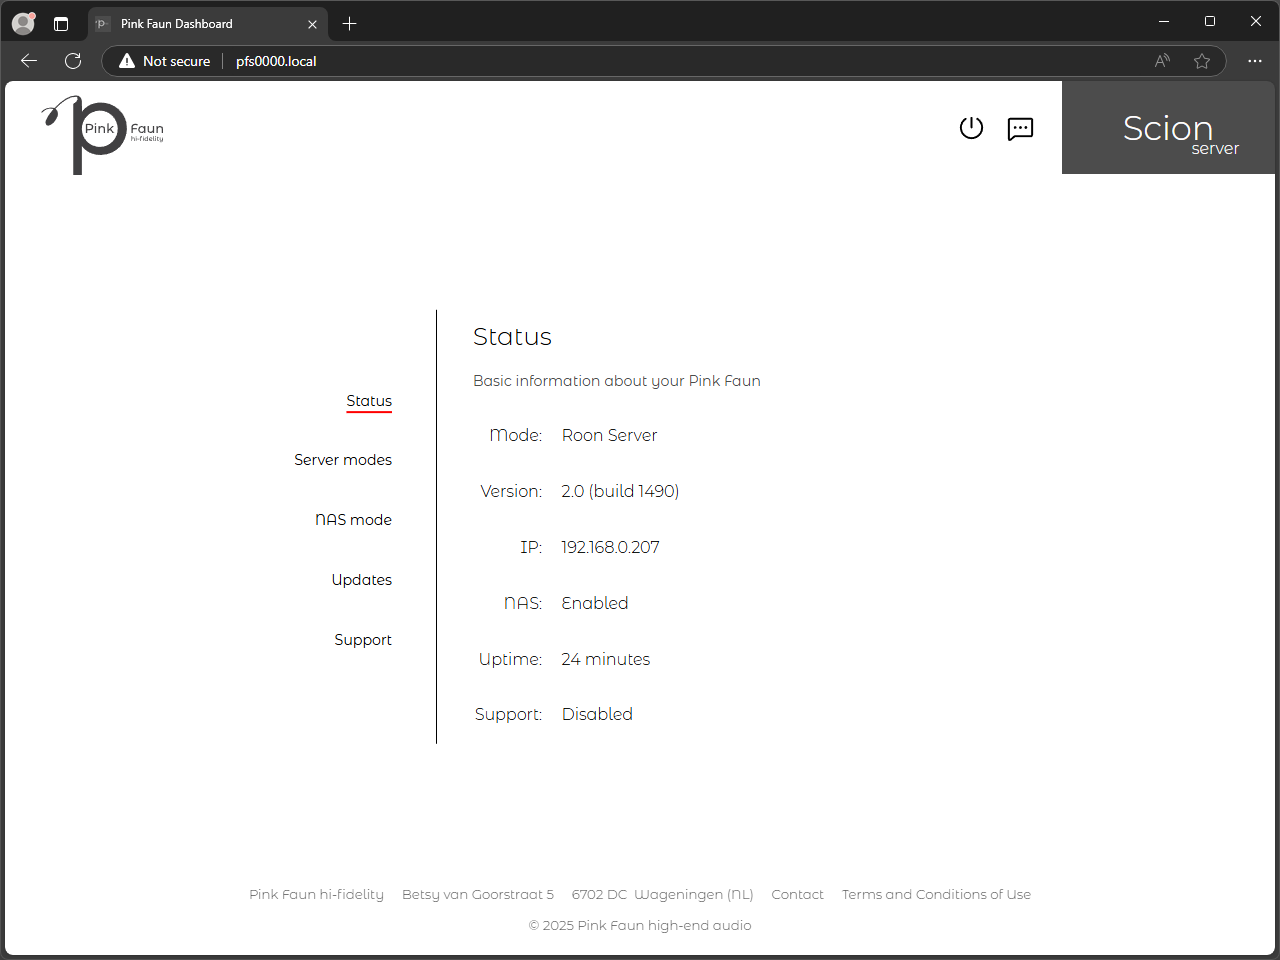
Dashboard - How to access
Using Roon - connecting to USB DACs
Copy music to and from your Scion
- MacOS computers
- Windows computers
Troubleshooting
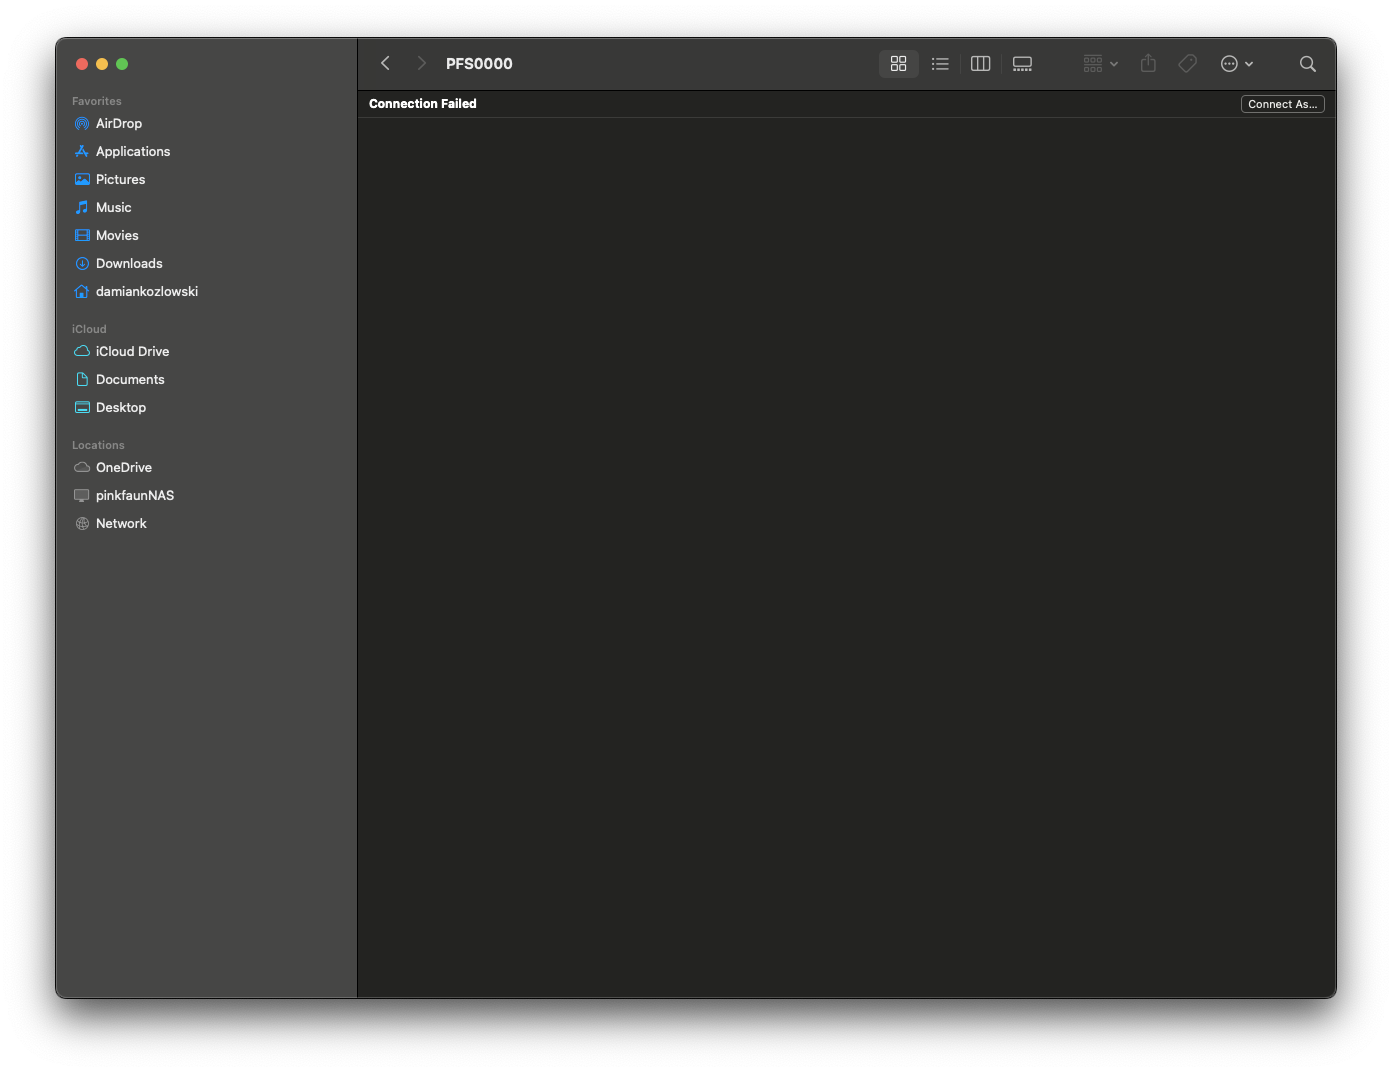
5. As this access is protected with login and password, you will be greeted by a message “Connection Failed” when attempting to connect for the first time. Click on “Connect As…” button visible in the top right corner of Finder window
6. New, smaller confirmation window will appear. Click on “Connect” to begin authorization:
 7. Authorization window will now be visible on the screen. Select “Registered User” and fill-in login and password with “pinkfaun”. Make sure to accept checkbox “Remember this password in my keychain” and then confirm credentials by clicking on “Connect” button. This login information will be saved and used automatically each time connection is attempted in the future:
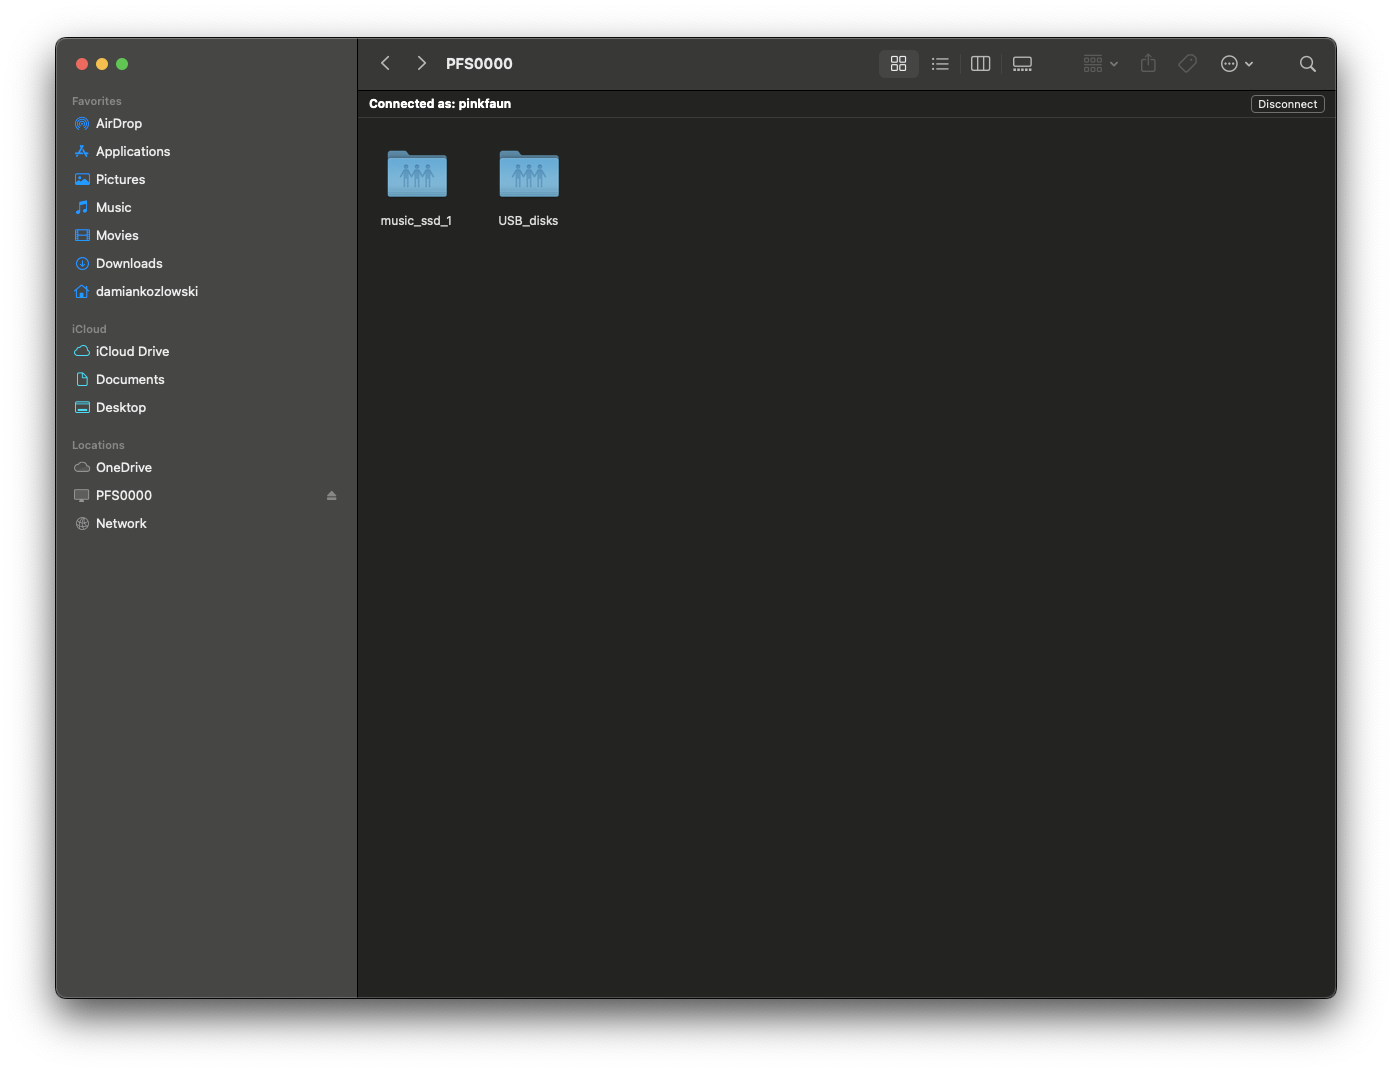
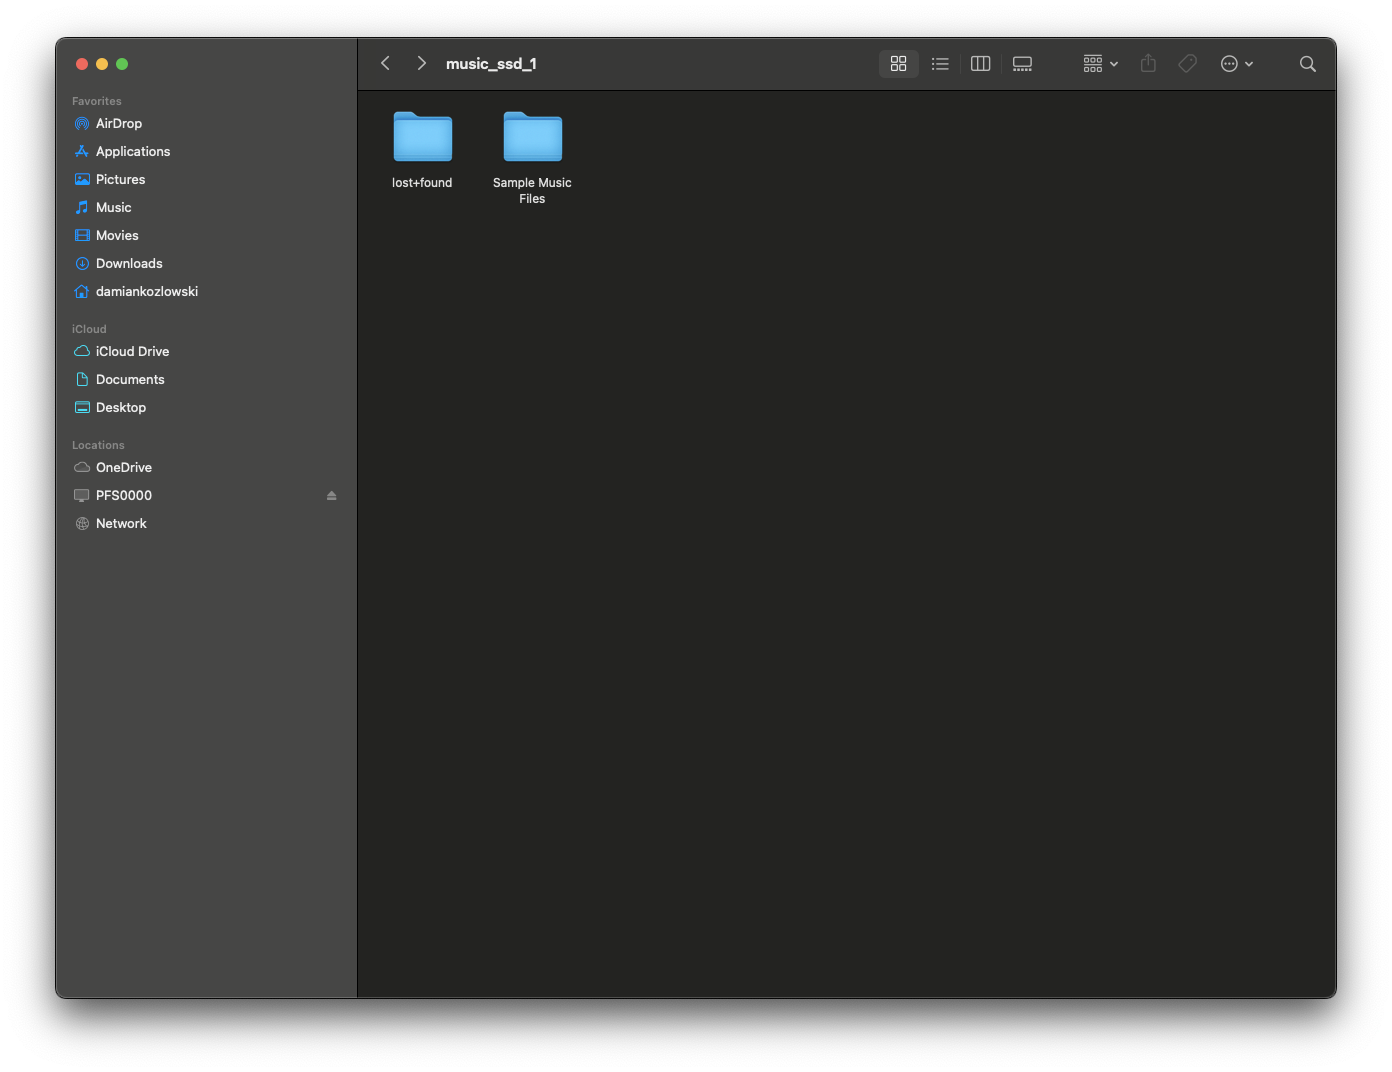
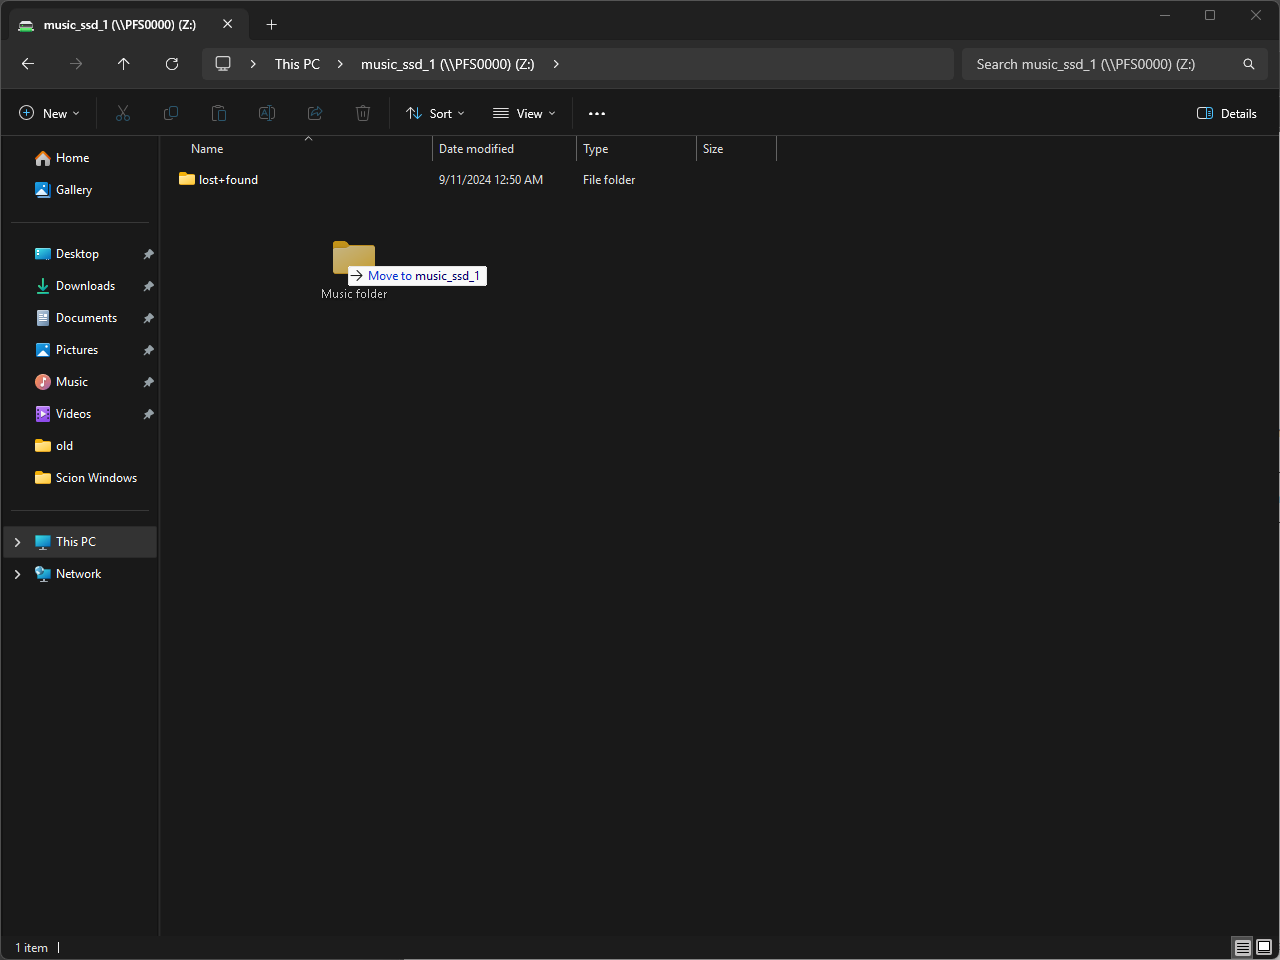
 8. After a successful login, you now have access to the integrated storage. Music storage is represented by “music_ssd_1”. Double click on the “music_ssd_1” icon to enter the folder:
The folder “lost+found” is a system location that should not be removed or modified. Do not attempt to copy files into this folder.
9. Now, that successful connection has been established, files can be copied or pasted to or from music_ssd_1:
 To copy new files into the music_ssd_1 folder:
10. Navigate to the directory where your music is stored.
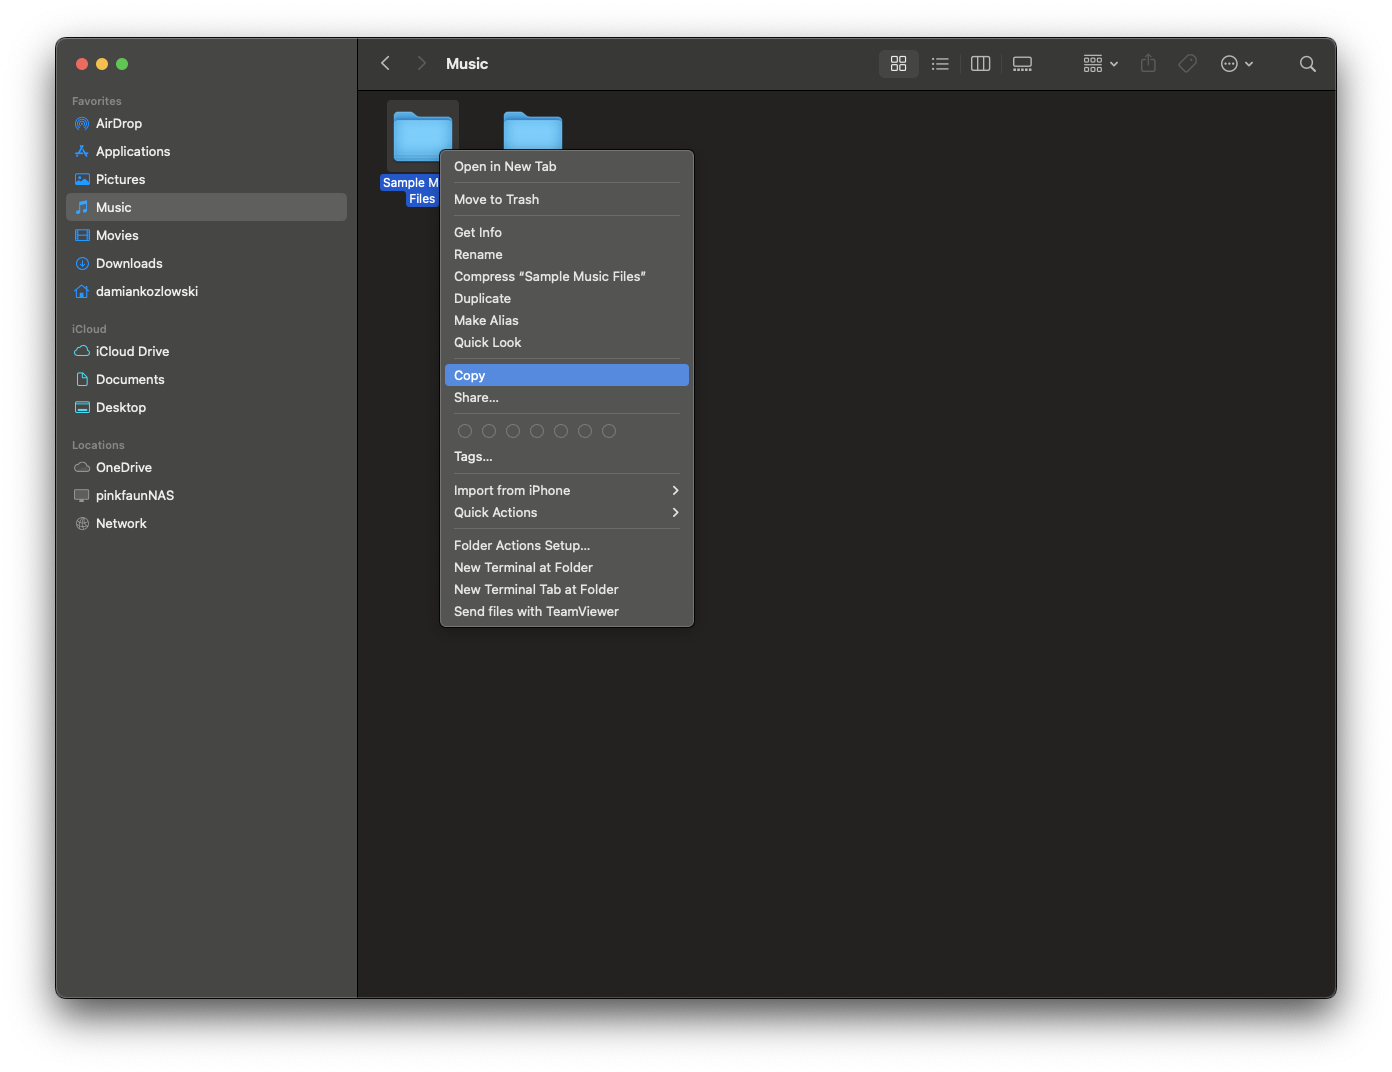
11. Select all required folders and choose “Copy” from the right-click context menu:
 12. Navigate to the music_ssd_1 folder.
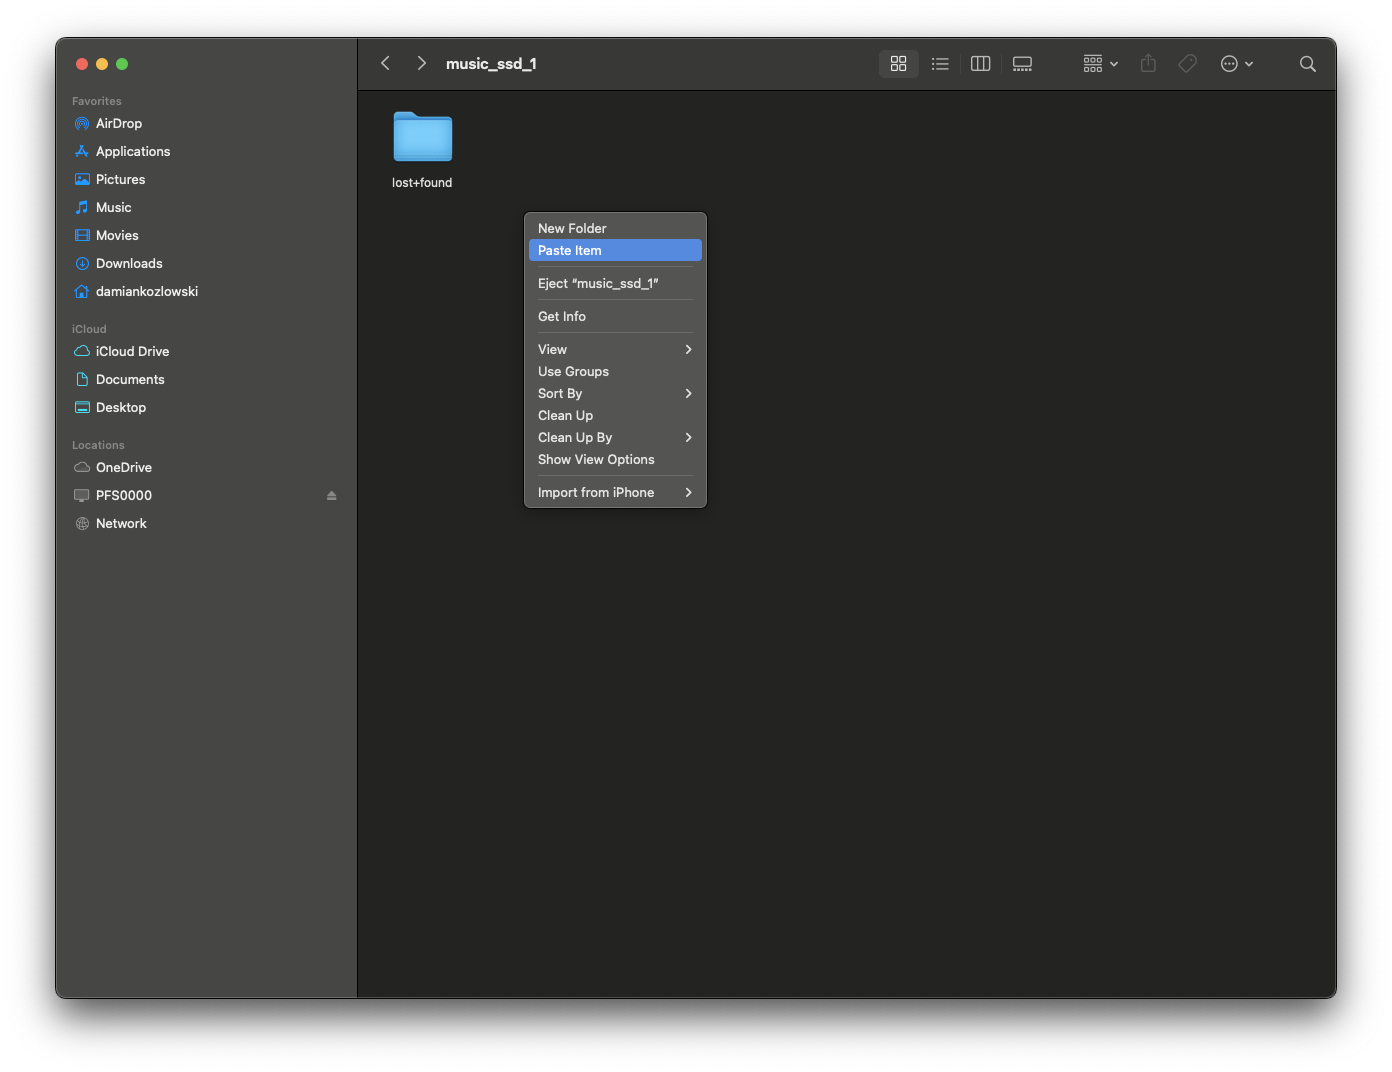
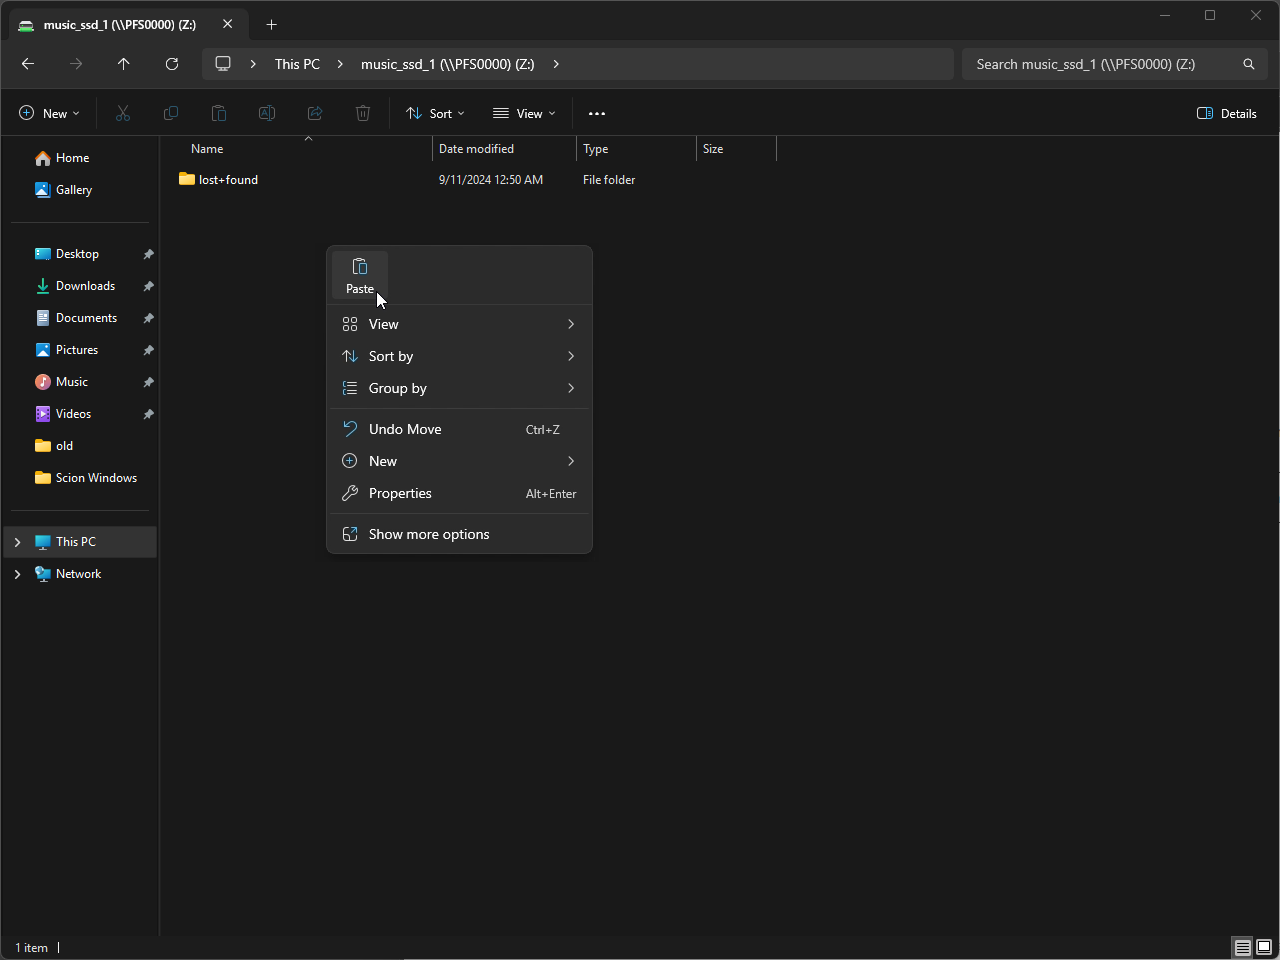
13. Use the “Paste” option in the right-click context menu:
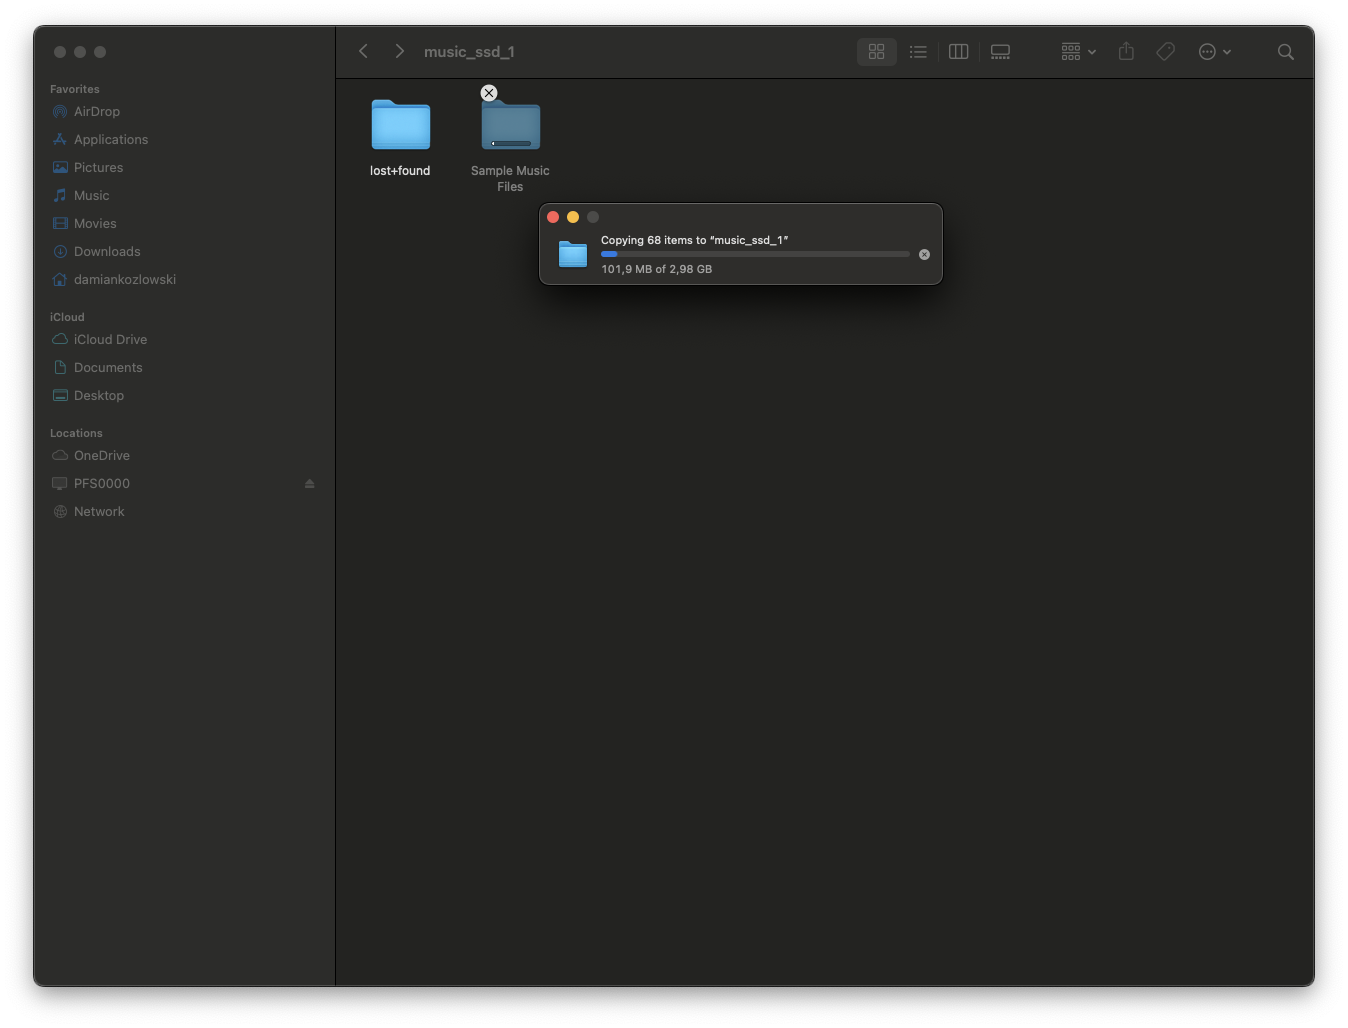
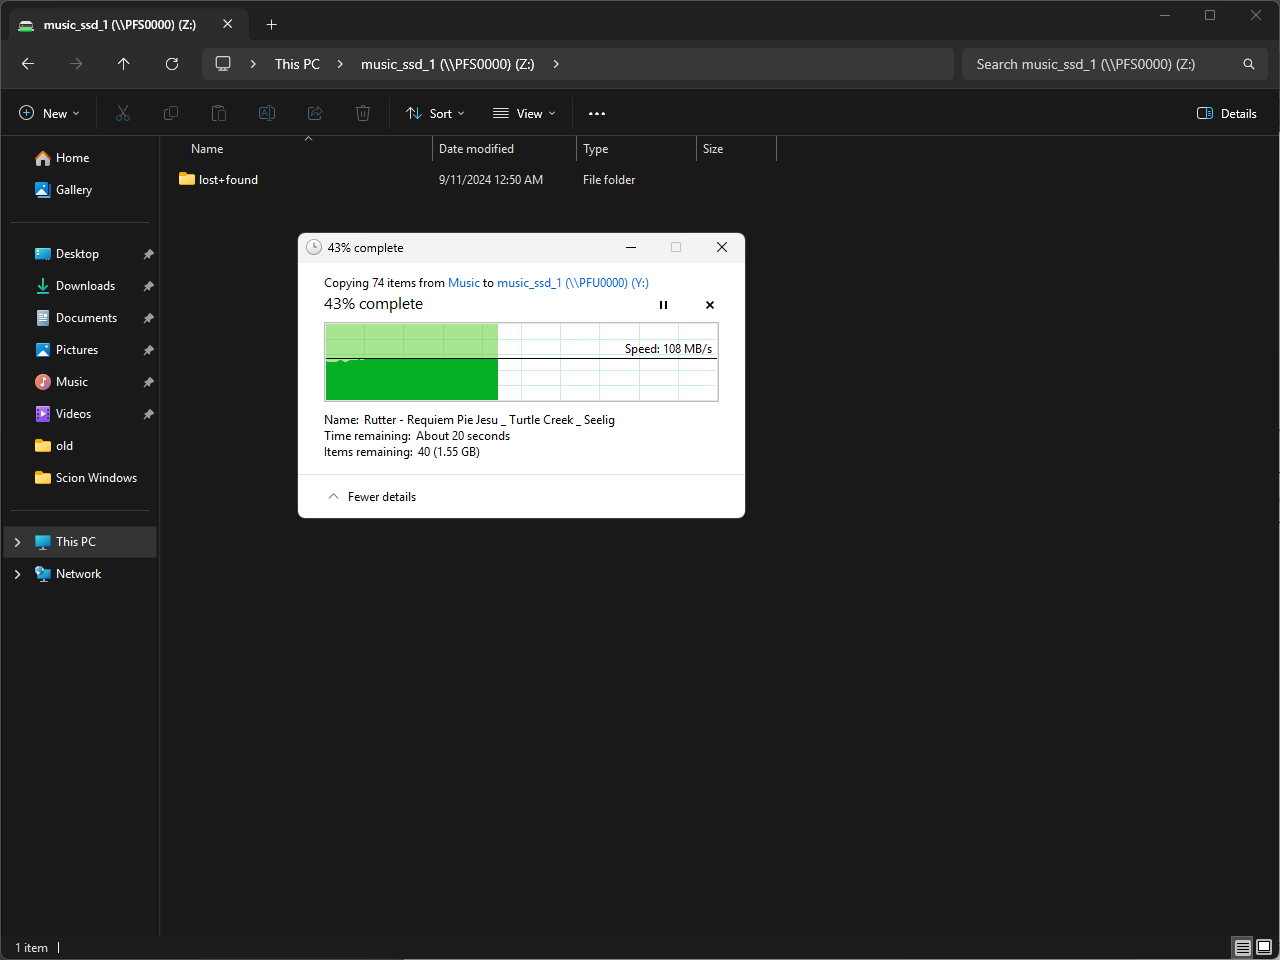
 14. A progress window will appear, showing the remaining time for the transfer:
 Your files have now been successfully transferred to the integrated storage. It is recommended to keep a backup copy on an external hard drive or other storage medium for added redundancy.
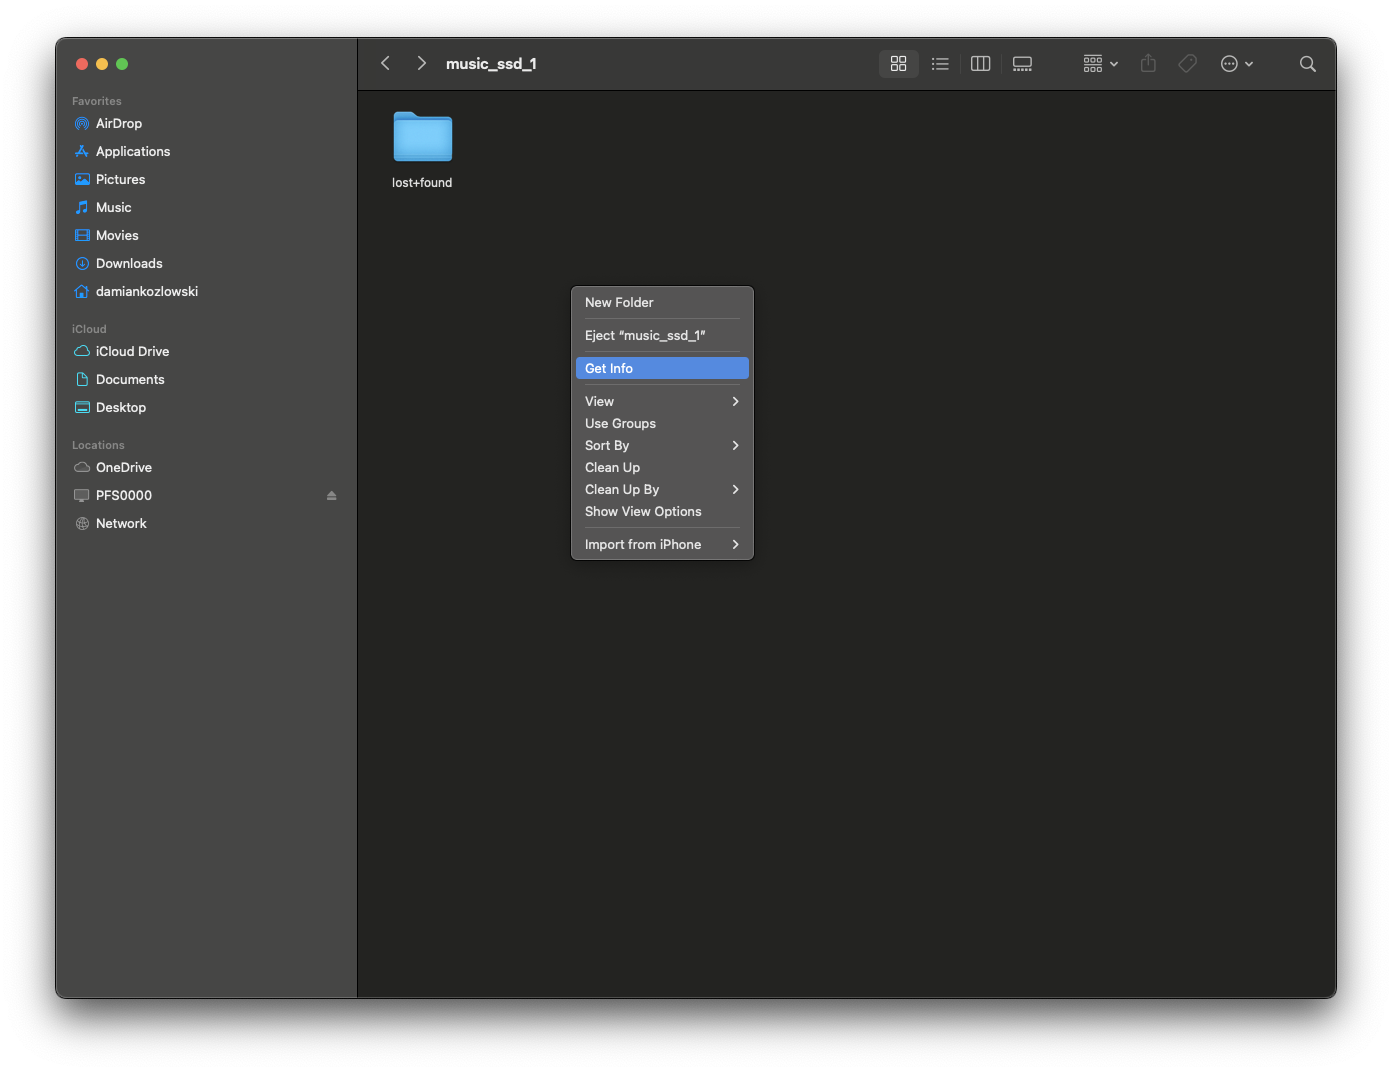
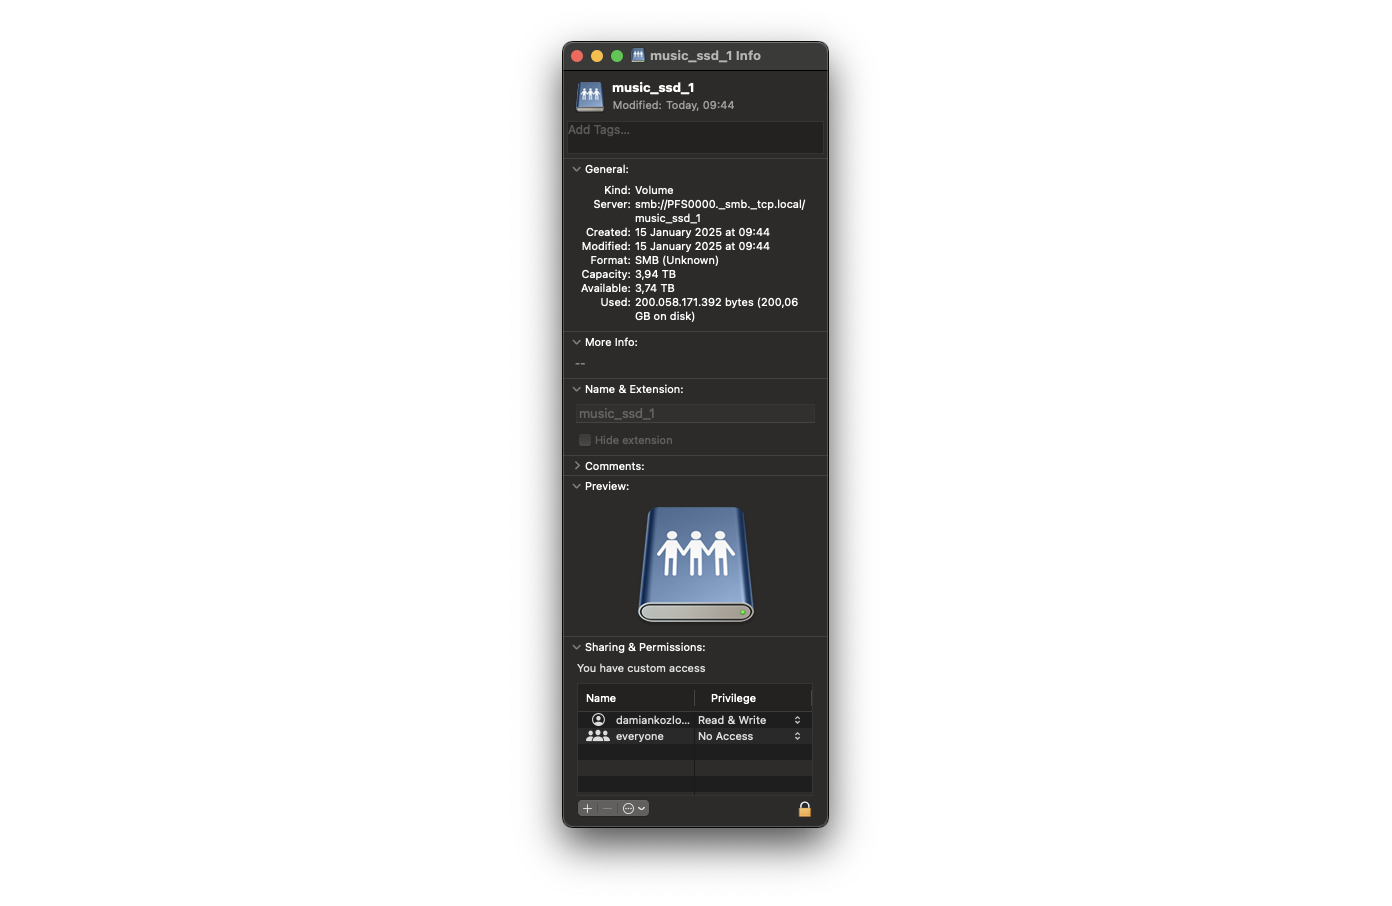
15. To check the storage size and occupied space, use the “Get Info” option from the right-click context menu. Be sure to use this option while inside the SSD folder.
Make sure to navigate into the Scion server dashboard and disable NAS mode once all required files have been copied as performance in this mode is decreased
Part 2 - Windows computers
Storage inside the Pink Faun Scion can be reached from any computer that is connected to the same network as your music server. By default, however, this access is disabled. We advise to enable it only for the time needed to copy files to or from the streamer.
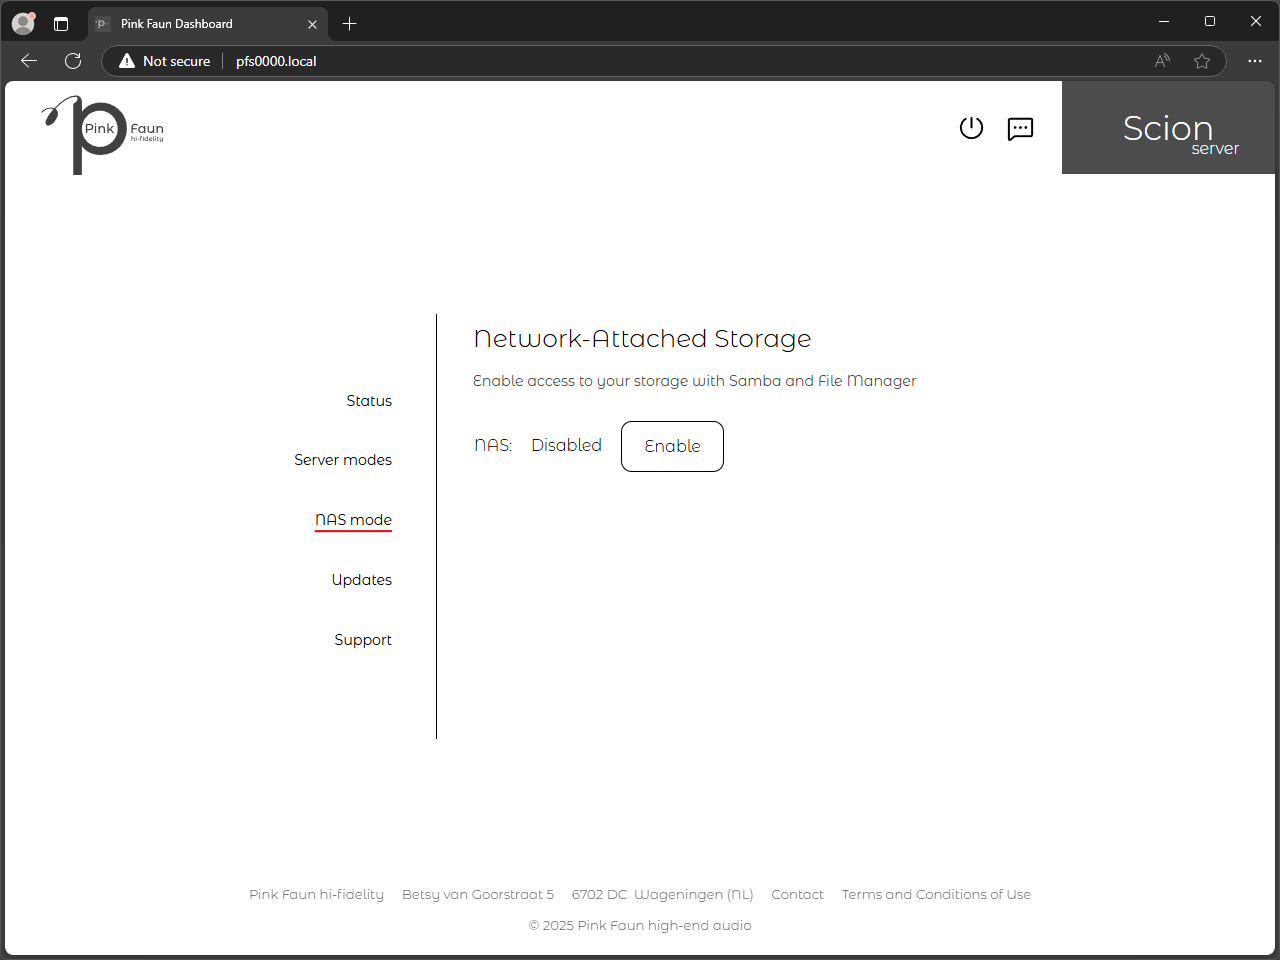
Network-attached-storage (NAS) mode is used for network file access. To enable NAS mode, navigate to the dashboard and enable NAS mode in the associated tab:
1. Open Microsoft Edge, type the serial number (found on the back panel of the Scion chassis) followed by “.local” in the address bar and press Enter.
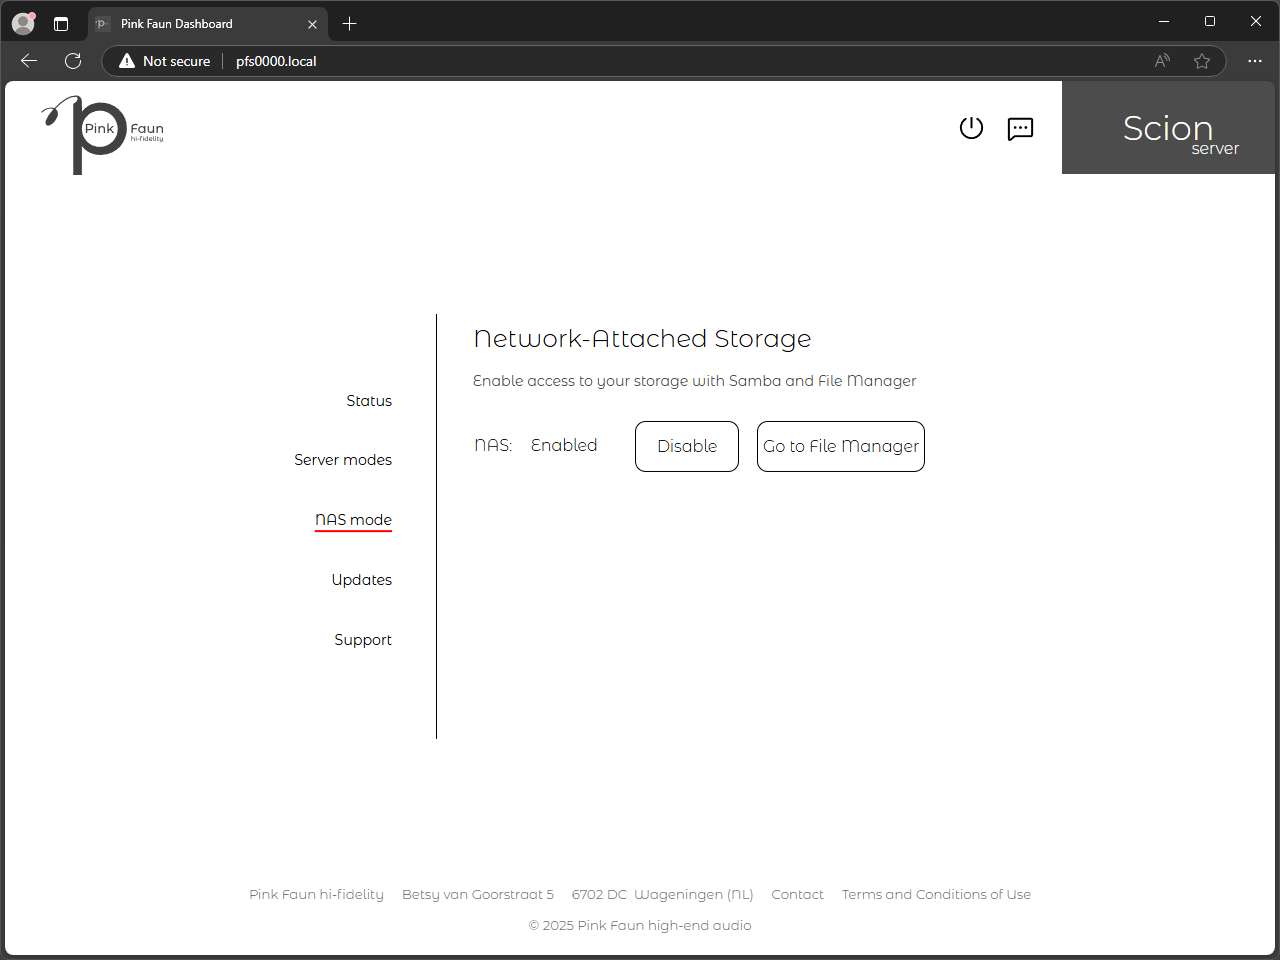
 2. Navigate to “NAS mode” tab and click on “Enable”. After approximately 5 seconds “NAS: Enabled” information will indicate that this mode is active.
 Once NAS mode has been activated. the integrated storage inside Scion server can be accessed using Windows File Explorer
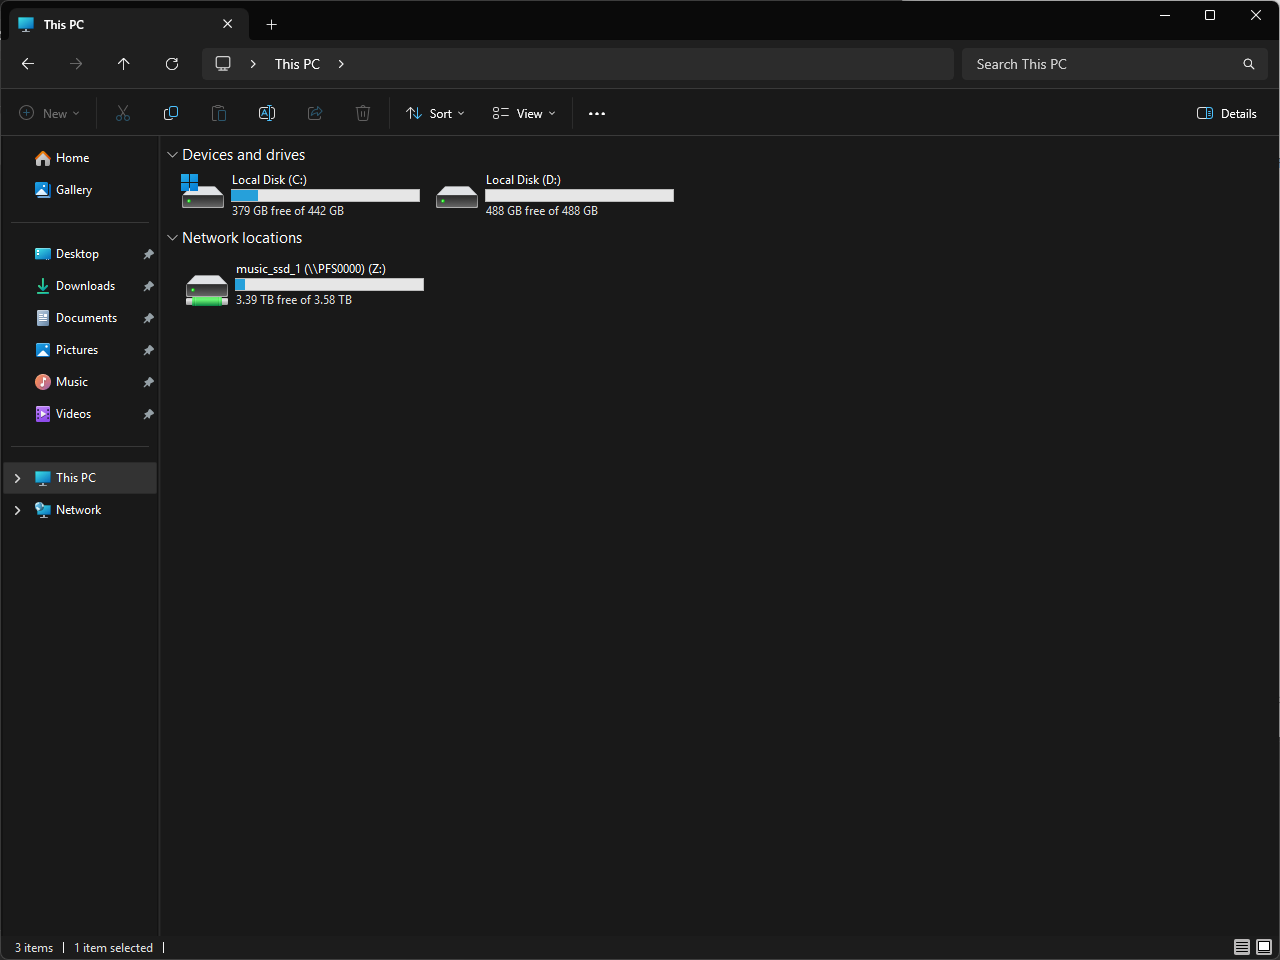
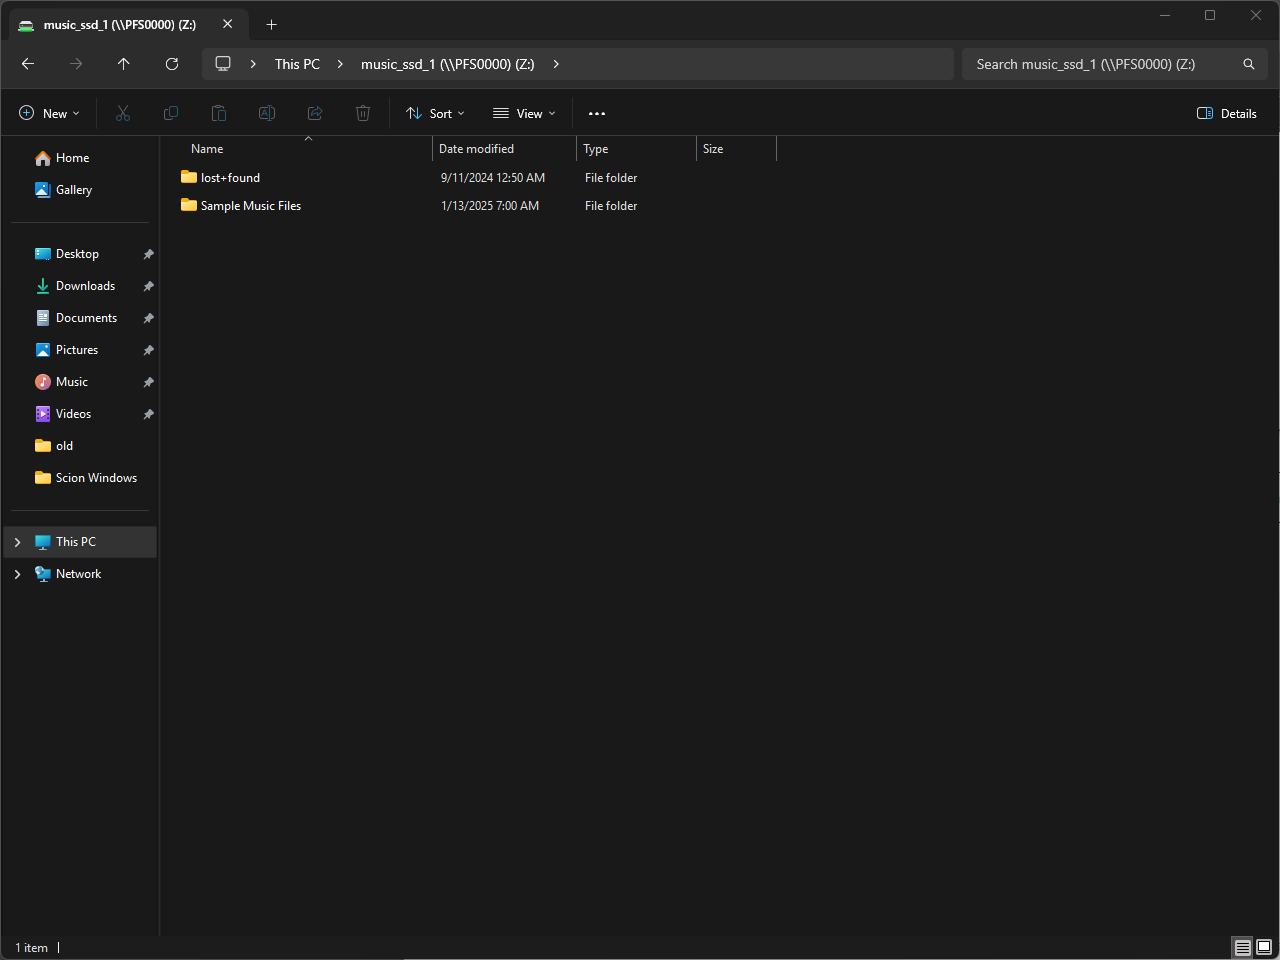
3. Open File Explorer and navigate to the network tab. Locate Scion server visible by its serial number among network devices.
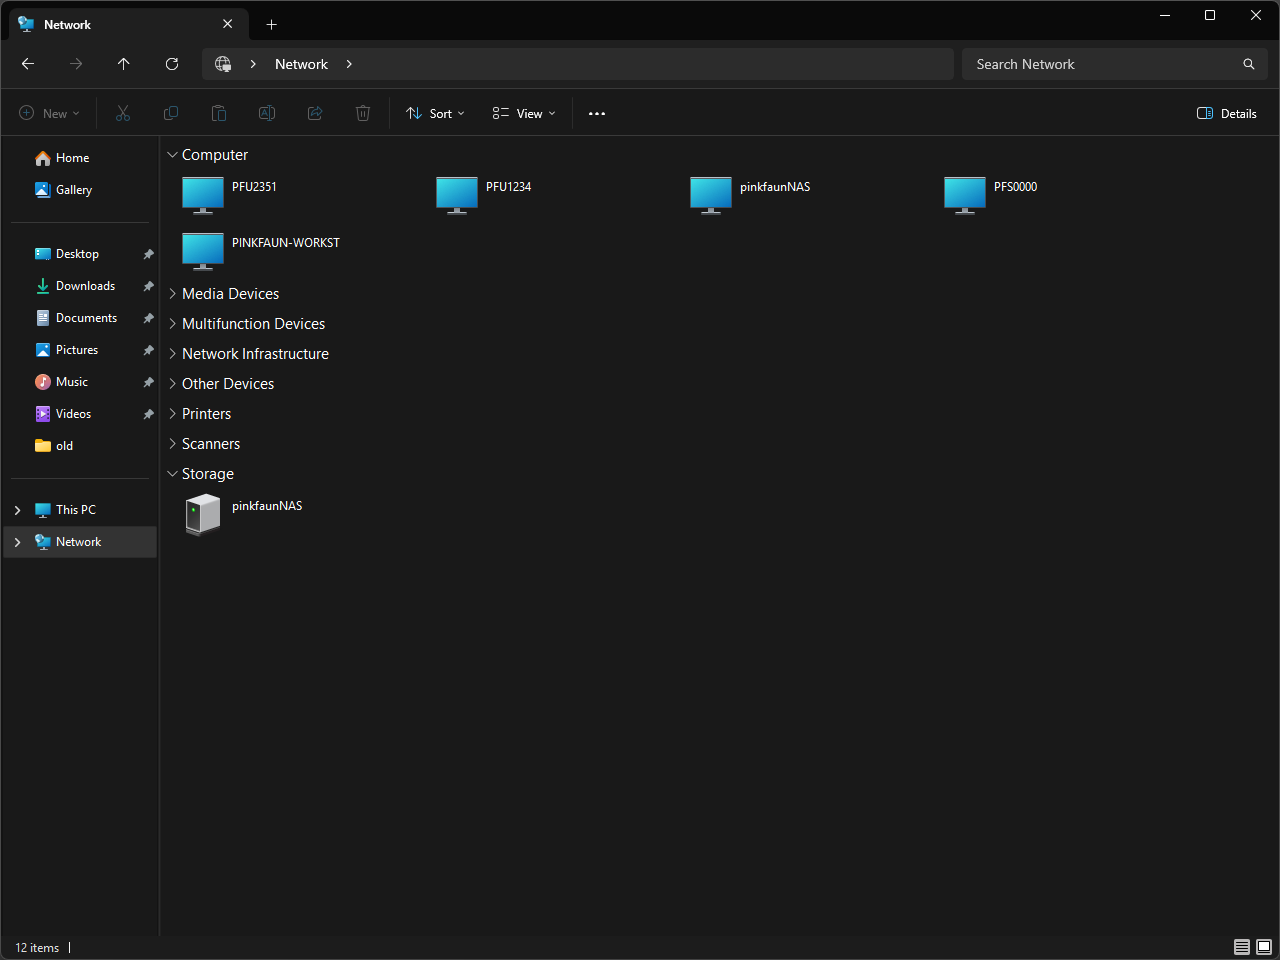 4. Click two times quickly on the respective icon:
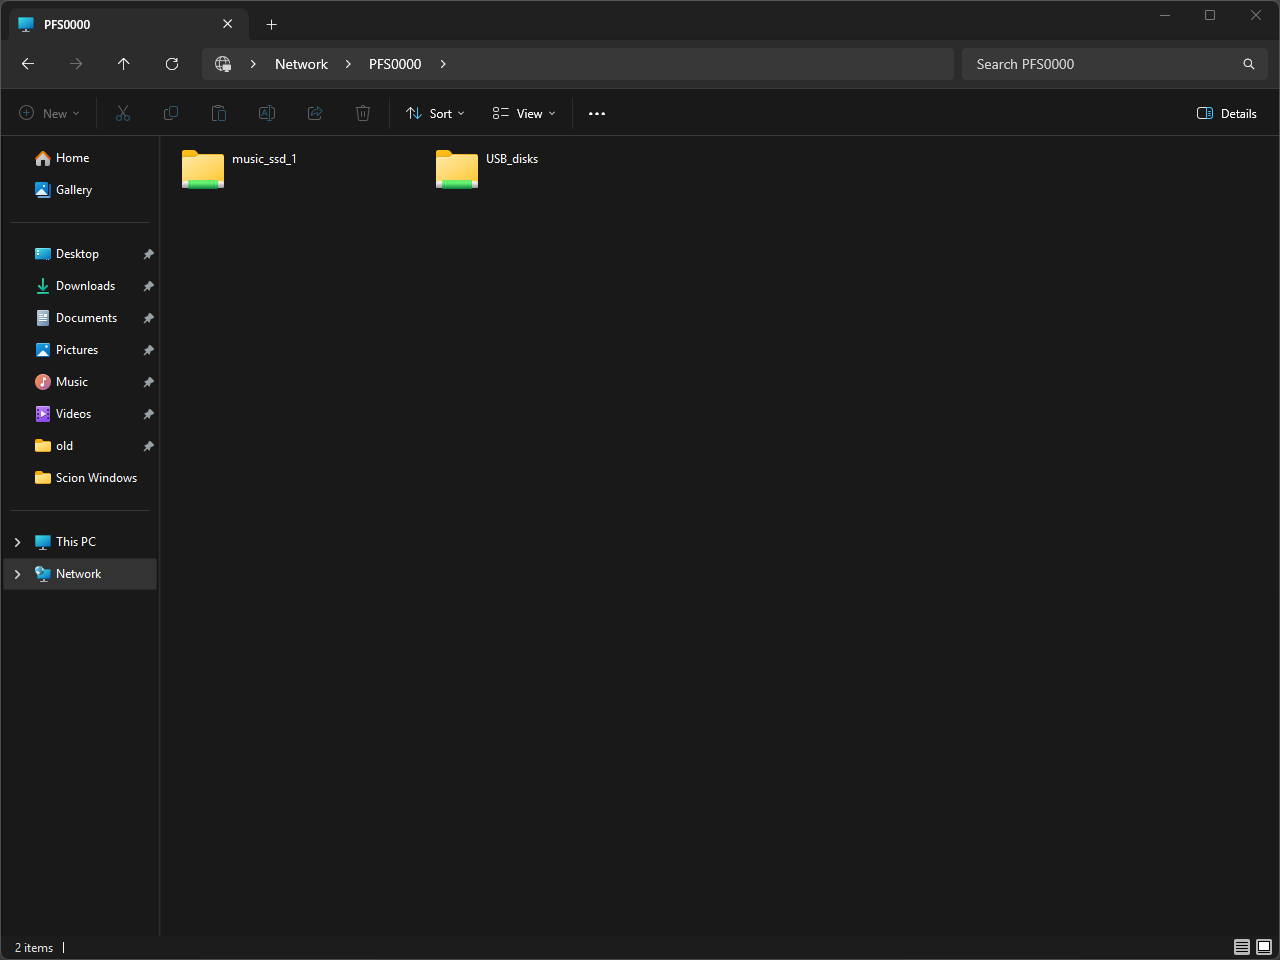
As this access is protected with login and password, you will be greeted by an authentication window. Fill-in login and password with “pinkfaun”. Confirm credentials by clicking on “OK” button. This login information will be saved and used automatically each time connection is attempted in the future.
 5. After a successful login, you now have access to the integrated storage. Music storage is represented by “music_ssd_1”. Music can be copied or pasted to music_ssd folders, however, for convenience of use it is advised to ‘map’ these locations as a network drives.
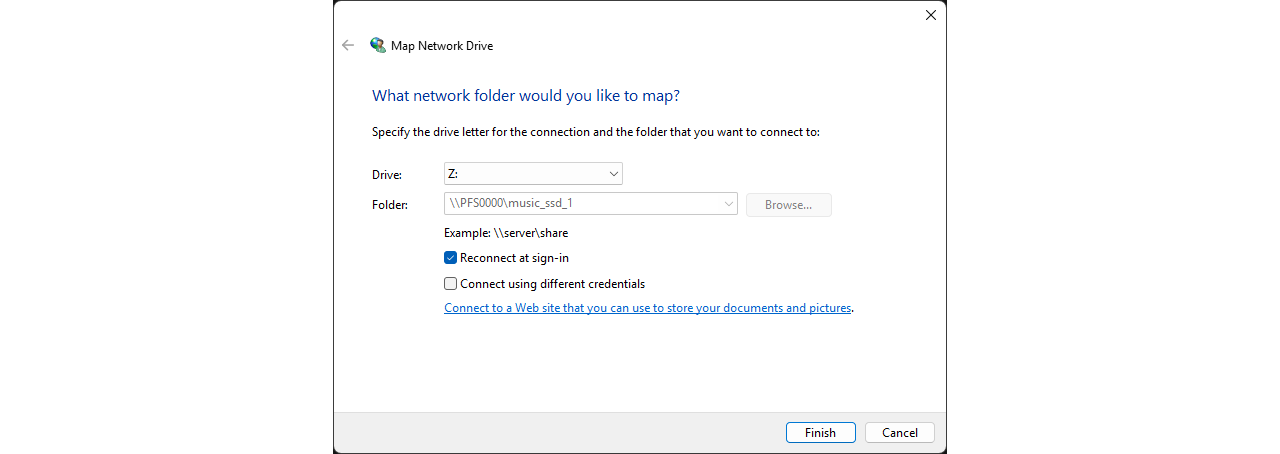
 6. Right-click on “music_ssd_1” icon and select “Map network drive…” option from the context menu. You will be greeted by an overview window, where all necessary information will be filled automatically. Confirm by clicking on “Finish” button.
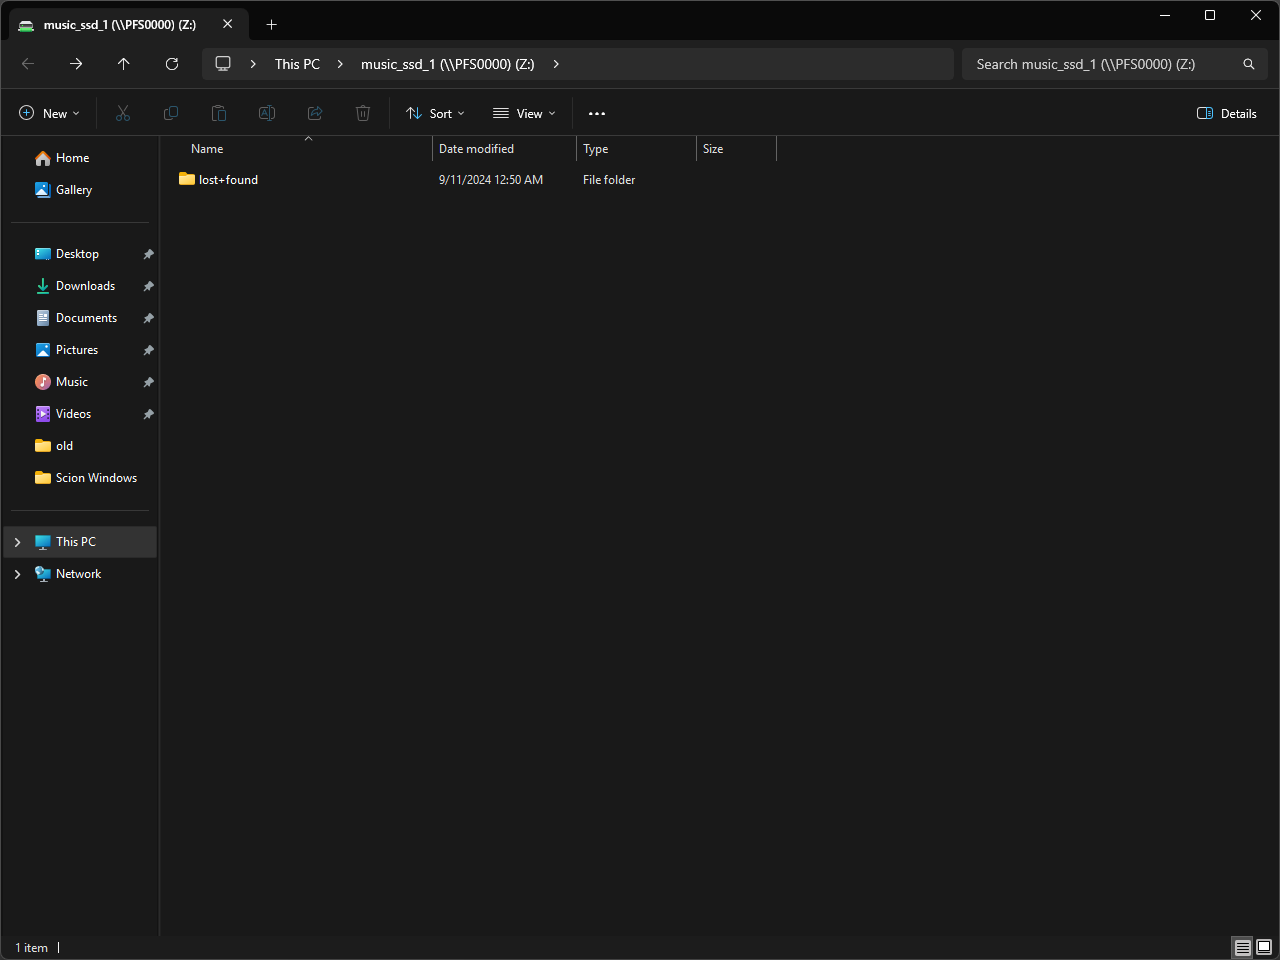
 New window with contents of “music_ssd_1” will appear to confirm successful ‘mapping’ operation. Click on “This PC” and locate new network location.
 This network location will remain in “This PC” overview, even when NAS mode has been disabled. In such case, detailed information will not be available and any attempts to connect will result in connection error.


The folder “lost+found” is a system location that should not be removed or modified. Do not attempt to copy files into this folder.
7. Now, that successful connection has been established, files can be copied or pasted to or from music_ssd_1.
To copy new files into the music_ssd_1 folder:
8. Navigate to the directory where your music is stored.
9. Select all required folders and choose “Copy” from the right-click context menu:
 10. Navigate to the music_ssd_1 network directory from “This PC” overview.
11. Use the “Paste” option in the right-click context menu:
 12. A progress window will appear, showing the remaining time for the transfer:
 Your files have now been successfully transferred to the integrated storage. It is recommended to keep a backup copy on an external hard drive or other storage medium for added redundancy.
Make sure to navigate into the Scion server dashboard and disable NAS mode once all required files have been copied as performance in this mode is decreased